Qt Online Installer and Qt Installer Framework 4.8.0 Released
We have released Qt Online Installer and Qt Installer Framework 4.8.0 today. The release provides several bug fixes. Most important fixes are as follows:
We have released Qt Online Installer and Qt Installer Framework 4.8.0 today. The release provides several bug fixes. Most important fixes are as follows:

At the Qt World Summit 2023, Marko Klemetti, CTO of Eficode, delivered a speech on the future of software development, particularly in embedded development. He began the speech by quoting Martin Woodward of GitHub, stating, “Software development will change more in the next five years than it has in the last 40 years.” Klemetti highlighted the rapid evolution of software development and encouraged organizations to seek ways to improve their development pace and reduce complexity. To that end, Klemetti presented six areas to streamline the DevOps pipeline:
I was tasked to come up with a simple architecture for remote real time instantiation of arbitrary QML components. I’ve split my findings into 3 blog entries, each one covering a slightly different topic. Part 1 focuses on the software design pattern used to dynamically instantiate components. Part 2 shows how to layout these dynamic components by incorporating QML’ s positioning and layout APIs. The last entry, consisting of Parts 3 and 4, addresses the anchors API and important safety aspects.
This is Part 2: Laying Out Components with Qt Quick and JSON
Now that we know how to instantiate trees of components, the next thing we should be able to do is lay them out on screen. If you’ve watched our Introduction to QML series, you’ll know Qt provides 4 ways to place objects in QML:
For maximum flexibility, the factory design approach should support all four methods of component placement.
    // Root component of the factory and nodes
    Component {
        id: loaderComp
        required property var modelData
        Loader {
            id: instantiator
            // ...
            onItemChanged: {
                // ...
                if (typeof(modelData.x) === "number")
                    loaderComp.x = modelData.x;
                if (typeof(modelData.y) === "number")
                    loaderComp.y = modelData.y;
                // ...
            }
        }
    }
import QtQuick.Layouts

Item {
    ColumnLayout {
        Button {
            text: "1st button"
            Layout.fillWidth: true
        }
        Button {
            text: "2nd button"
            Layout.fillWidth: true
        }
    }
}
Now, for the Layouts API to work in our factory, the recursion described in Part I must be in place.
In addition to that, we need to take into account a property of the Loader object component: Loader inherits from Item. The items loaded by the Loader component are actually children of Loader and, as a result, must be placed relative to the loader, not its parent. This means we shouldn’t be setting Layout attached properties onto the instantiated components, but instead should set them on the Loader that is parent to our item, IDed as instantiator.
Here’s an example of what the model could define. As you can see, I’ve replaced the dot used for attached properties with an underscore.
    property var factoryModel: [
        {
            "component": "ColumnLayout",
            "children": [
                {
                    "component": "Button",
                    "text": "1st button",
                    "Layout_fillWidth": true
                },
                {
                    "component": "Button",
                    "text": "2nd button",
                    "Layout_fillWidth": true
                }
            ]
        }
    ]
Here’s what we will do, based on that model:
    // Root component of the factory and nodes
    Component {
        id: loaderComp
        Loader {
            id: instantiator
            required property var modelData
            sourceComponent: switch (modelData.component) {
                case "Button":
                return buttonComp;
                case "Column":
                return columnComp;
                case "ColumnLayout":
                return columnLayoutComp;
            }
            onItemChanged: {
                // Pass children
                if (typeof(modelData.children) === "object")
                    item.model = modelData.children;

                // Layouts
                if (typeof(modelData.Layout_fillWidth) === "bool") {
                    // Apply fillWidth to the container instead of the item
                    instantiator.Layout.fillWidth = modelData.Layout_fillWidth;
                    // Anchor the item to the container so that it produces the desired behavior
                    item.anchors.left = loaderComp.left;
                    item.anchors.right = loaderComp.right;
                }

                // Button properties
                switch (modelData.component) {
                    case "Button":
                    // If the model contains certain value, we may assign it:
                    if (typeof(modelData.text) === "string")
                        item.text = modelData.text;
                    break;
                }
                // ...
            }
        }
    }
As you can see, the attached property is set on the instantiator which acts as a container, and the component item is then anchored to that container. I do not simply anchor all children to fill the parent Loader because different components have different default sizes, and the Loader is agnostic of its children’s sizes.
Here’s the implementation for the Button, Column, and ColumnLayout components. Feel free to modify the JSON from factoryModel to use Column instead of ColumnLayouts, or any componentizations that you implement yourself.
    Component {
        id: buttonComp
        Button {
            property alias children: itemRepeater.model
            children: Repeater {
                id: itemRepeater
                delegate: loaderComp
            }
        }
    }
    Component {
        id: columnComp
        Column {
            property alias model: itemRepeater.model
            children: Repeater {
                id: itemRepeater
                delegate: loaderComp
            }
        }
    }
    Component {
        id: columnLayoutComp
        ColumnLayout {
            property alias model: itemRepeater.model
            children: Repeater {
                id: itemRepeater
                delegate: loaderComp
            }
        }
    }
To summarize, we can dynamically attach attributes to our dynamically instantiated components to configure QML layouts. It’s important to keep in mind that the Loader will hold our dynamic component as its children, so we must assign our dimensions to the Loader and have the child mimic its behavior, possibly by anchoring to it, but this could also be done the other way around.
In the next entry I’ll be covering how to implement anchors and the security implications for which dynamically instantiating components from JSON might not be a good idea after all. Our previous entry is Recursive Instantiation with Qt Quick and JSON.
If you like this article and want to read similar material, consider subscribing via our RSS feed.
Subscribe to KDAB TV for similar informative short video content.
KDAB provides market leading software consulting and development services and training in Qt, C++ and 3D/OpenGL. Contact us.
The post Laying Out Components with Qt Quick and JSON appeared first on KDAB.

We are happy to announce the release of Qt Creator 13.0.1!

If you develop a Felgo or Qt app for iOS and upload it to the app store via AppStore Connect, you may face a new Apple warning e-mail these days:
We noticed one or more issues with a recent submission for App Store review for the following app.
Although submission for App Store review was successful, you may want to correct the following issues in your next submission for App Store review. Once you've corrected the issues, upload a new binary to App Store Connect.
ITMS-91053: Missing API declaration - Your app’s code in the “iosproject” file references one or more APIs that require reasons, including the following API categories: NSPrivacyAccessedAPICategorySystemBootTime. While no action is required at this time, starting May 1, 2024, when you upload a new app or app update, you must include a NSPrivacyAccessedAPITypes array in your app’s privacy manifest to provide approved reasons for these APIs used by your app’s code.
ITMS-91053: Missing API declaration - Your app’s code in the “iosproject” file references one or more APIs that require reasons, including the following API categories: NSPrivacyAccessedAPICategoryDiskSpace. While no action is required at this time, starting May 1, 2024, when you upload a new app or app update, you must include a NSPrivacyAccessedAPITypes array in your app’s privacy manifest to provide approved reasons for these APIs used by your app’s code.
ITMS-91053: Missing API declaration - Your app’s code in the “iosproject” file references one or more APIs that require reasons, including the following API categories: NSPrivacyAccessedAPICategoryUserDefaults. While no action is required at this time, starting May 1, 2024, when you upload a new app or app update, you must include a NSPrivacyAccessedAPITypes array in your app’s privacy manifest to provide approved reasons for these APIs used by your app’s code.
ITMS-91053: Missing API declaration - Your app’s code in the “iosproject” file references one or more APIs that require reasons, including the following API categories: NSPrivacyAccessedAPICategoryFileTimestamp. While no action is required at this time, starting May 1, 2024, when you upload a new app or app update, you must include a NSPrivacyAccessedAPITypes array in your app’s privacy manifest to provide approved reasons for these APIs used by your app’s code.
Apple Developer Relations
Without a proper fix, Apple has rejected app submissions to App Store Connect since May 1st.
In an attempt to prevent fingerprinting, Apple recently added a new policy that requires you to provide a specific reason if you are using one of the APIs that Apple identified as a possible backdoor for fingerprinting. Fingerprinting refers to using specific APIs or device signals to uniquely identify a device or user for the purpose of tracking, even though users might not be aware of that.
While you may not use those APIs directly, Qt or any third-party framework integrated into your app may. Read on to learn how to fix the issue.
![]()
In our last post we had a look at how to set up QML Modules and how we can benefit from the QML Linter. Today we’re going to set up the QML Language Server to get an IDE-like experience in an editor of our choice. We’ll also help the the QML Compiler generate more efficient code.

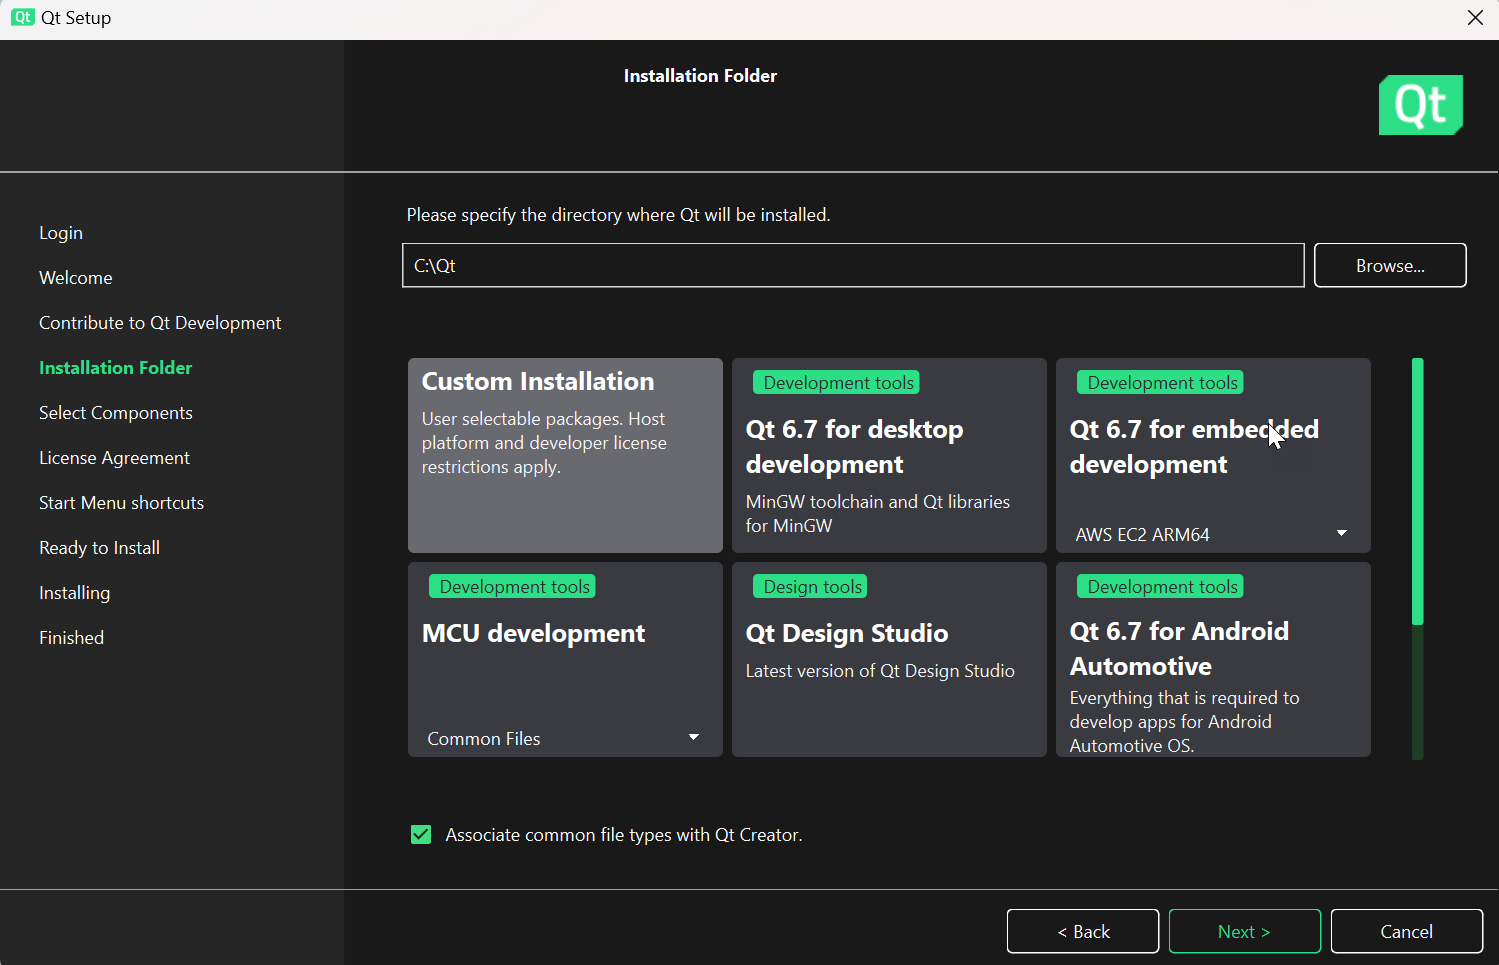
When you install Qt from the Qt Installer, you have a selection of target platforms. On Windows, at the time of writing, this is MinGW, MSVC as regular choices, and LLVM-MinGW as a Technology Preview. This basically specifies the environment which is used to build Qt code for that packages. Most importanly, this also de-facto specifies a version of the compiler which you should use for your development work, if you use pre-built Qt.
In Qt 6.7.0, for example, we support MSVC 2022, MSVC 2019, MinGW 11.2 as compilers (see this page in the Qt documentation), but we do not provide binary Qt packages built with MSVC 2022 which is the current version of MSVC. For future releases of Qt 6, we need to move faster towards more modern MSVC 2022 and start to phase out MSVC 2019 as an older version.
This will be a change not only for the Qt release team, but also for Qt users, who use these binary packages. We want to make it as smooth as possible and got a plan which we want to share here. BTW, the below changes are only related to MSVC and do not concern MinGW packages for Windows.
In one of the next bug-fix releases of Qt 6.7, possibly in Qt 6.7.2, we will add packages built with MSVC 2022 in addition to the MSVC 2019 ones as we have now. The upcoming Qt 6.8 will have packages for Windows built with MSVC 2022 only, and MSVC 2019 ones will be discontinued in binary packages. Future Qt 6.7.x bug-fix releases will still contain builds wirh MSVC2019 in binary packages as long as Qt 6.7 is supported.
We see this as a migration path which gives MSVC users a possibility to test Qt 6.7.x binary packages with both versions of MSVC in their projects.
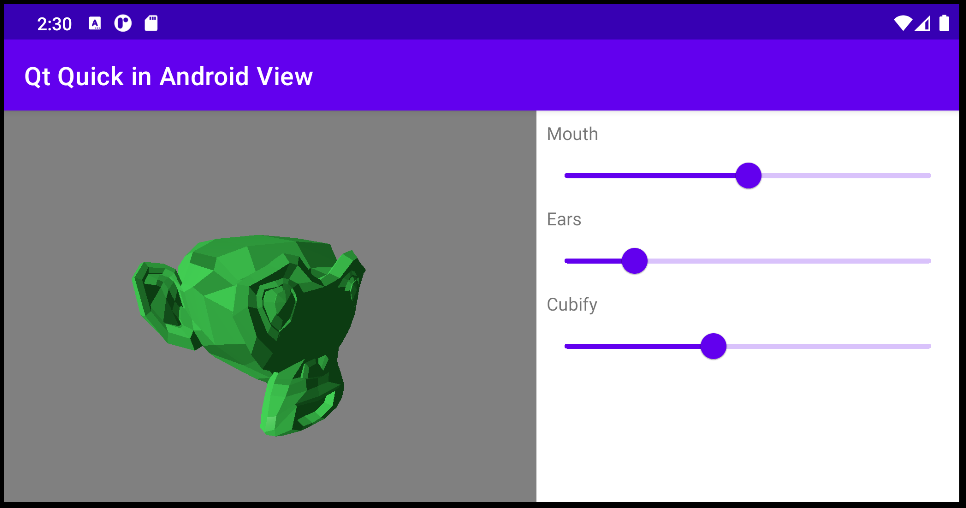
This blog post is the first one in a series where we are going to have a look at one exciting feature coming as a Technology Preview in 6.7.0: the ability to use QML and Qt Quick in your otherwise non-Qt Android apps as an Android View! We've also created an Android Studio plugin to help you keep the workflow simple. In this first post, we'll have an overview of the feature, what it entails, why we are adding it, and where you could benefit from it. In the following posts, we will show how to use it along with some code examples and take a closer look at the tooling, testing, and some possible use cases, such as 3D.
QStringConverter has an invalid pointer being passed as a callback which can allow modification of the stack and has been assigned the CVE id CVE-2024-33861.
&
96
|
The post C++ & Rust, Servo Web & Qt, Qt Quick & JSON, Embedded – blogs & videos, Hotspot 1.5, Qt 6.7, GCompris in India, Events appeared first on KDAB.
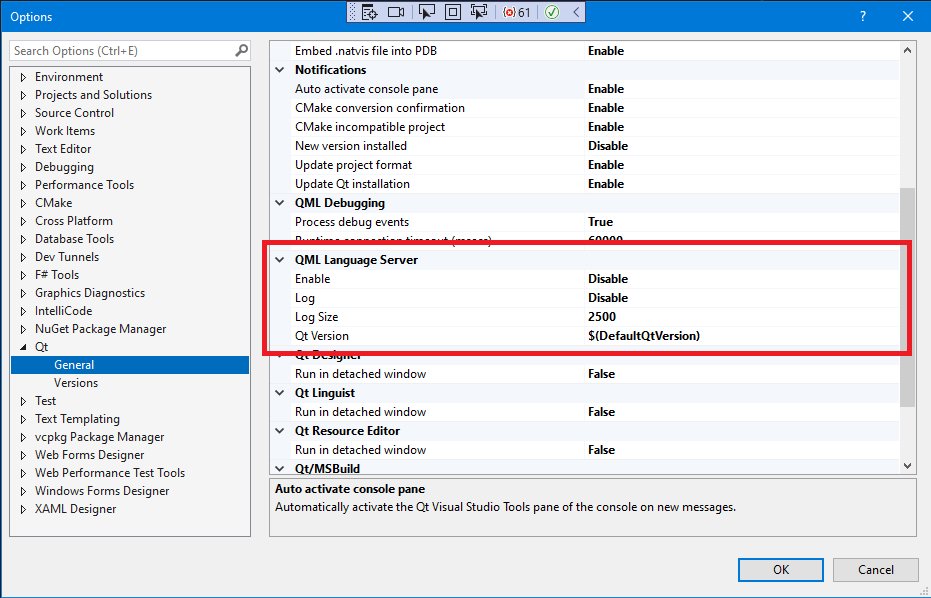
We are happy to announce the release of the Qt Visual Studio Tools version 3.2.0. Installation packages are now available at the Visual Studio Marketplace and download.qt.io.
This update of the Qt VS Tools extension adds experimental support for QML LSP server, as well as full support of the Qt VS Tools for Visual Studio 2022 on ARM64.
Qt MSBuild file support:
Alongside providing Qt-related MSBuild files within the Qt VS Tools package, we now offer them as a separate .zip download for your convenience. Starting from version 3.2.0, access the standalone Qt MSBuild files by visiting our public server download location: Official releases.
Please refer to the project's Changelog for a list of all changes included in this release. Feel free to report any problems, or make any suggestions or comments, in the Qt Visual Studio Tools bug tracker.
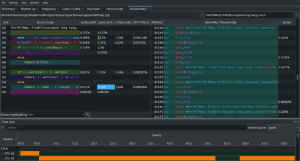
Hotspot is a standalone GUI designed to provide a user-friendly interface for analyzing performance data. It takes a perf.data file, parses and evaluates its contents, and presents the results in a visually appealing and easily understandable manner. Our goal with Hotspot is to offer a modern alternative to perf report, making performance analysis on Linux systems more intuitive and efficient.
It comes packed with a wealth of code cleanups, bug fixes and new functionality. Most notably, the disassembly view has been further improved with better searching, highlighting and faster performance.
Furthermore, we reworked the authentication mechanism to allow perf record to be run directly, with elevated priveleges, via pkexec, obsoleting the error prone old mechanism (see also https://nvd.nist.gov/vuln/detail/CVE-2023-28144).
We now also fully support Qt6 and KF6, while keeping compatibility with Qt5 and KF5. The AppImage below is still built with Qt5 but it might be the last time that we do this. The next version might become Qt6 only.
Many thanks to the various contributors who help build this software, both by writing code as well as reporting bugs.
To get a more detailed scope over all the changes in this new release, check out the full changelog on GitHub. More information about Hotspot can be obtained on its GitHub page or by watching this video.
Happy profiling everyone 🚀
If you like this article and want to read similar material, consider subscribing via our RSS feed.
Subscribe to KDAB TV for similar informative short video content.
KDAB provides market leading software consulting and development services and training in Qt, C++ and 3D/OpenGL. Contact us.
The post Hotspot v1.5.0 released appeared first on KDAB.
![]()
Qt 5.15 introduced “Automatic Type Registration”. With it, a C++ class can be marked as “QML_ELEMENT” to be automatically registered to the QML engine. Qt 6 takes this to the next level and builds all of its tooling around the so-called QML Modules. Let’s talk about what this new infrastructure means to your application in practice and how to benefit from it in an existing project.
Continue reading How To Use Modern QML Tooling in Practice at basysKom GmbH.

The Felgo QML Hot Reload release 1.2.0 brings additional options on the connection screen, command line arguments, several QML Hot Reload improvements, and an overhauled user interface. Read on to check out all of the updates below:
With the 2024 Embedded World Exhibition & Conference in the rear view, here are some key impressions from the ICS team around the future of embedded development.
Recently I was tasked to come up with an architecture for remote real time instantiation and updating of arbitrary QML components.
This entry shows how you can use a simple variation of the factory method pattern in QML for instantiating arbitrary components. I’ve split my findings into 3 blog entries, each one covering a slightly different topic. Part 1 focuses on the software design pattern used to dynamically instantiate components. Part 2 shows how to layout these dynamic components by incorporating QML’ s positioning and layout APIs. The last entry, consisting of Parts 3 and 4, addresses the anchors API and important safety aspects.
This is Part 1: Recursive Instantiation with Qt Quick and JSON.
The original factory method pattern made use of static methods to programmatically instantiate objects of different classes, instead of having to call their constructors. It achieved that by having the classes share a common ancestor. Our variation of the popular pattern uses a Loader to choose which component to load, and a Repeater to dynamically instantiate arbitrary instances of this loader using a model.
Here we specify which components with a JSON array and use a Repeater to load them.
    id: root
    // A JSON representation of a QML layout:
    property var factoryModel: [
        {
            "component": "Button",
        },
        {
            "component": "Button",
        }
    ]
    // Root of our component factory
    Repeater {
        model: root.factoryModel
        delegate: loaderComp
    }
To be able to instantiate any kind of item, you can use a Component with a Loader inside, as the Repeater’s delegate. This allows you to load a different component based on the Repeater’s model data.
    // Root component of the factory and nodes
    Component {
        id: loaderComp
        Loader {
            id: instantiator
            required property var modelData
            sourceComponent: switch (modelData.component) {
                case "Button":
                return buttonComp;
                case "RowLayout":
                return rowLayoutComp;
                case "Item":
                default: return itemComp;
            }
        }
    }
To assign values from the model to the component, add a method that gets called when the Loader’s onItemChanged event is triggered. I use this method to take care of anything that involves the component’s properties:
    // Root component of the factory and nodes
    Component {
        id: loaderComp
        Loader {
            id: instantiator
            required property var modelData
            sourceComponent: switch (modelData.component) {
                case "Button":
                return buttonComp;
                case "RowLayout":
                return rowLayoutComp;
                case "Item":
                default: return itemComp;
            }
            onItemChanged: {
                // Pass children (see explanation below)
                if (typeof(modelData.children) === "object")
                    item.model = modelData.children;

                // Button properties
                switch (modelData.component) {
                    case "Button":
                    // If the model contains certain value, we may assign it:
                    if (typeof(modelData.text) !== "undefined")
                        item.text = modelData.text;
                    break;
                }

                // Item properties
                // Since Item is the parent of all repeatable, we don't need to check
                // if the component supports Item properties before we assign them:
                if (typeof(modelData.x) !== "undefined")
                    loaderComp.x = Number(modelData.x);
                if (typeof(modelData.y) !== "undefined")
                    loaderComp.y = Number(modelData.y);
                // ...
            }
        }
    }
Examples of components that loaderComp could load are defined below. To enable recursion, these components must contain a Repeater that instantiates children components, with loaderComp set as the delegate:
    Component {
        id: itemComp
        Item {
            property alias children: itemRepeater.model
            children: Repeater {
                id: itemRepeater
                delegate: loaderComp
            }
        }
    }
    Component {
        id: buttonComp
        Button {
            property alias children: itemRepeater.model
            children: Repeater {
                id: itemRepeater
                delegate: loaderComp
            }
        }
    }
    Component {
        id: rowLayoutComp
        RowLayout {
            property alias children: itemRepeater.model
            children: Repeater {
                id: itemRepeater
                delegate: loaderComp
            }
        }
    }
The Repeater inside of the components allows us to instantiate components recursively, by having a branch or more of children components in the model, like so:
    // This model lays out buttons vertically
    property var factoryModel: [
        {
            "component": "RowLayout",
            "children": [
                {
                    "component": "Button",
                    "text": "Button 1"
                },
                {
                    "component": "Button",
                    "text": "Button 2"
                }
            ]
        }
    ]
Here we’ve seen how we can use a Repeater, a JSON model, a Loader delegate, and simple recursive definition to instantiate arbitrary QML objects from a JSON description. In my next entry I will focus on how you can lay out these arbitrarily instantiated objects on your screen.
Thanks to Kevin Krammer and Jan Marker whose insights helped improve the code you’ve seen here.
I hope you’ve found this useful! Part 2 may be found already or later by following this link.
If you like this article and want to read similar material, consider subscribing via our RSS feed.
Subscribe to KDAB TV for similar informative short video content.
KDAB provides market leading software consulting and development services and training in Qt, C++ and 3D/OpenGL. Contact us.
The post Recursive Instantiation with Qt Quick and JSON appeared first on KDAB.
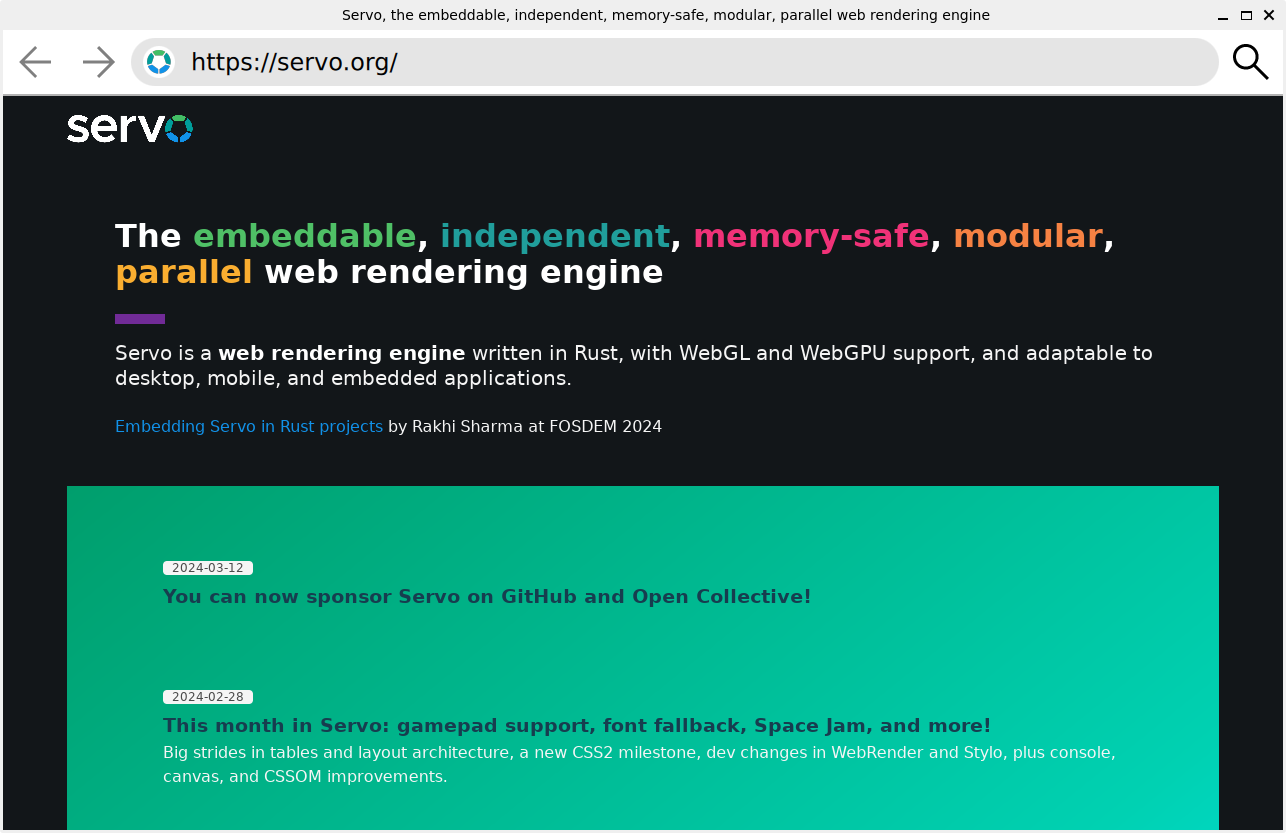
With the Qt WebEngine module, Qt makes it possible to embed a webview component inside an otherwise native application. Under the hood, Qt WebEngine uses the Chromium browser engine, currently the de facto standard engine for such use cases.
While the task of writing a brand new standard-compliant browser engine is infamous as being almost unachievable nowadays (and certainly so with Chromium coming in at 31 million lines of code), the Rust ecosystem has been brewing up a new web rendering engine called Servo. Initially created by Mozilla in 2012, Servo is still being developed today, now under the stewardship of the Linux Foundation.
With the browser inherently being exposed to the internet, it is usually the biggest attack vector on a system. Naturally this makes Servo very attractive as an alternative browser engine, given that it is written in a memory-safe language.
At KDAB we managed to embed the Servo web engine inside Qt, by using our CXX-Qt library as a bridge between Rust and C++. This means that we can now use Servo as an alternative to Chromium for webviews in Qt applications.
From a QML perspective this component is similar to the Chromium WebView, such as providing canGoBack, canGoForward, loading, title, url properties and goBack, goForward methods. The QML item itself acts in the same way with the contents being rendered to match its size.
import QtQuick
import QtQuick.Window

import com.kdab.servo

Window {
  height: 720
  width: 1280
  title: webView.title
  visible: true

  ServoWebView {
    id: webView
    anchors.fill: parent
    url: "https://servo.org/"
  }
}
The screenshot below shows a basic QML application with a toolbar containing back, forward, go buttons and an address bar. We use CXX-Qt to define Qt properties, invokables, and event handlers (e.g. touch events) in Rust and trigger events in the Servo engine. Then any update requests from Servo can trigger an update of the Qt side via the Qt event loop.
As we move towards stabilising CXX-Qt at KDAB, investigating real world use cases, such as exposing Servo to Qt, allows us to identify potential missing functionality and explore what is possible when joining the Rust and Qt ecosystems together.
Under the hood most of the heavy lifting is done by our CXX-Qt bindings, which already bridges the obvious gap between the Rust and Qt/C++ worlds. However, some further glue is needed to connect the rendering contexts of Servo to being able to render the surfaces into the actual Qt application. Internally, Servo uses surfman, a Rust library to manage rendering surfaces. At the time of writing, surfman supports OpenGL and Metal, with support for Vulkan being planned.
We use surfman to create a new OpenGL context, that Servo then uses for rendering. To render the result into the QtQuick scene, we borrow the surface from Servo, create a new framebuffer object and blit the framebuffer into a QQuickFrameBufferObject on the Qt side.
Servo development is active again after a period of less activity, therefore the API is evolving and there is work to improve the API for embedders. This could result in a simpler and documented process for integrating Servo into apps. Also as part of the Tauri and Servo collaboration, a backend for WRY could become available. All of these result in many possible changes for the bridge to Qt, as currently this demo directly constructs Servo components (similar to servoshell) but could instead use a shared library or WRY instead.
On the Qt side, there are areas that could be improved or investigated further. For example, currently we are using a framebuffer object which forces use of the OpenGL backend, but with RHI, developers might want to use other backends. A way to solve this for QML would be to change the implementation to instead use a custom Qt Scene Graph node, which can then have implementations for Vulkan, OpenGL etc and read from the Servo engine.
Alternatively Qt 6.7 has introduced a new QQuickRhiItem element, which is currently a technical preview, but can be used as a rendering API-agnostic alternative to QQuickFrameBufferObject.
If this sounds interesting to your use case or you would like to collaborate with us, the code for this tech demo is available on GitHub under KDABLabs/cxx-qt-servo-webview or contact KDAB directly. We also have a Zulip chat if you want to discuss any parts of bridging Servo or CXX-Qt with us.
Come and see us at Embedded World 2024 where we will have the Servo demo and others on display!
The post Embedding the Servo Web Engine in Qt appeared first on KDAB.
![]()
With this blog post, we introduce the QtQuickComputeItem - a Qt Quick item that allows you to easily integrate compute shader into your Qt Quick Code.
Compute
Shader are used to perform arbitrary computations on the GPU. For
example, the screenshot below shows a Qt Quick application that
generates Gray Scott Reaction Diffusion patterns. The simulation is executed by a compute shader that is configured directly in QML.
Continue reading Use Compute Shader in Qt Quick at basysKom GmbH.
Adding images to your application is a common requirement, whether you're building an image/photo viewer, or just want to add some decoration to your GUI. Unfortunately, because of how this is done in Qt, it can be a little bit tricky to work out at first.
In this short tutorial, we will look at how you can insert an external image into your PySide6 application layout, using both code and Qt Designer.
Since you're wanting to insert an image you might be expecting to use a widget named QImage or similar, but that would make a bit too much sense! QImage is actually Qt's image object type, which is used to store the actual image data for use within your application. The widget you use to display an image is QLabel.
The primary use of QLabel is of course to add labels to a UI, but it also has the ability to display an image — or pixmap — instead, covering the entire area of the widget. Below we'll look at how to use QLabel to display a widget in your applications.
First, create a MainWindow object in Qt Designer and add a "Label" to it. You can find Label at in Display Widgets in the bottom of the left hand panel. Drag this onto the QMainWindow to add it.
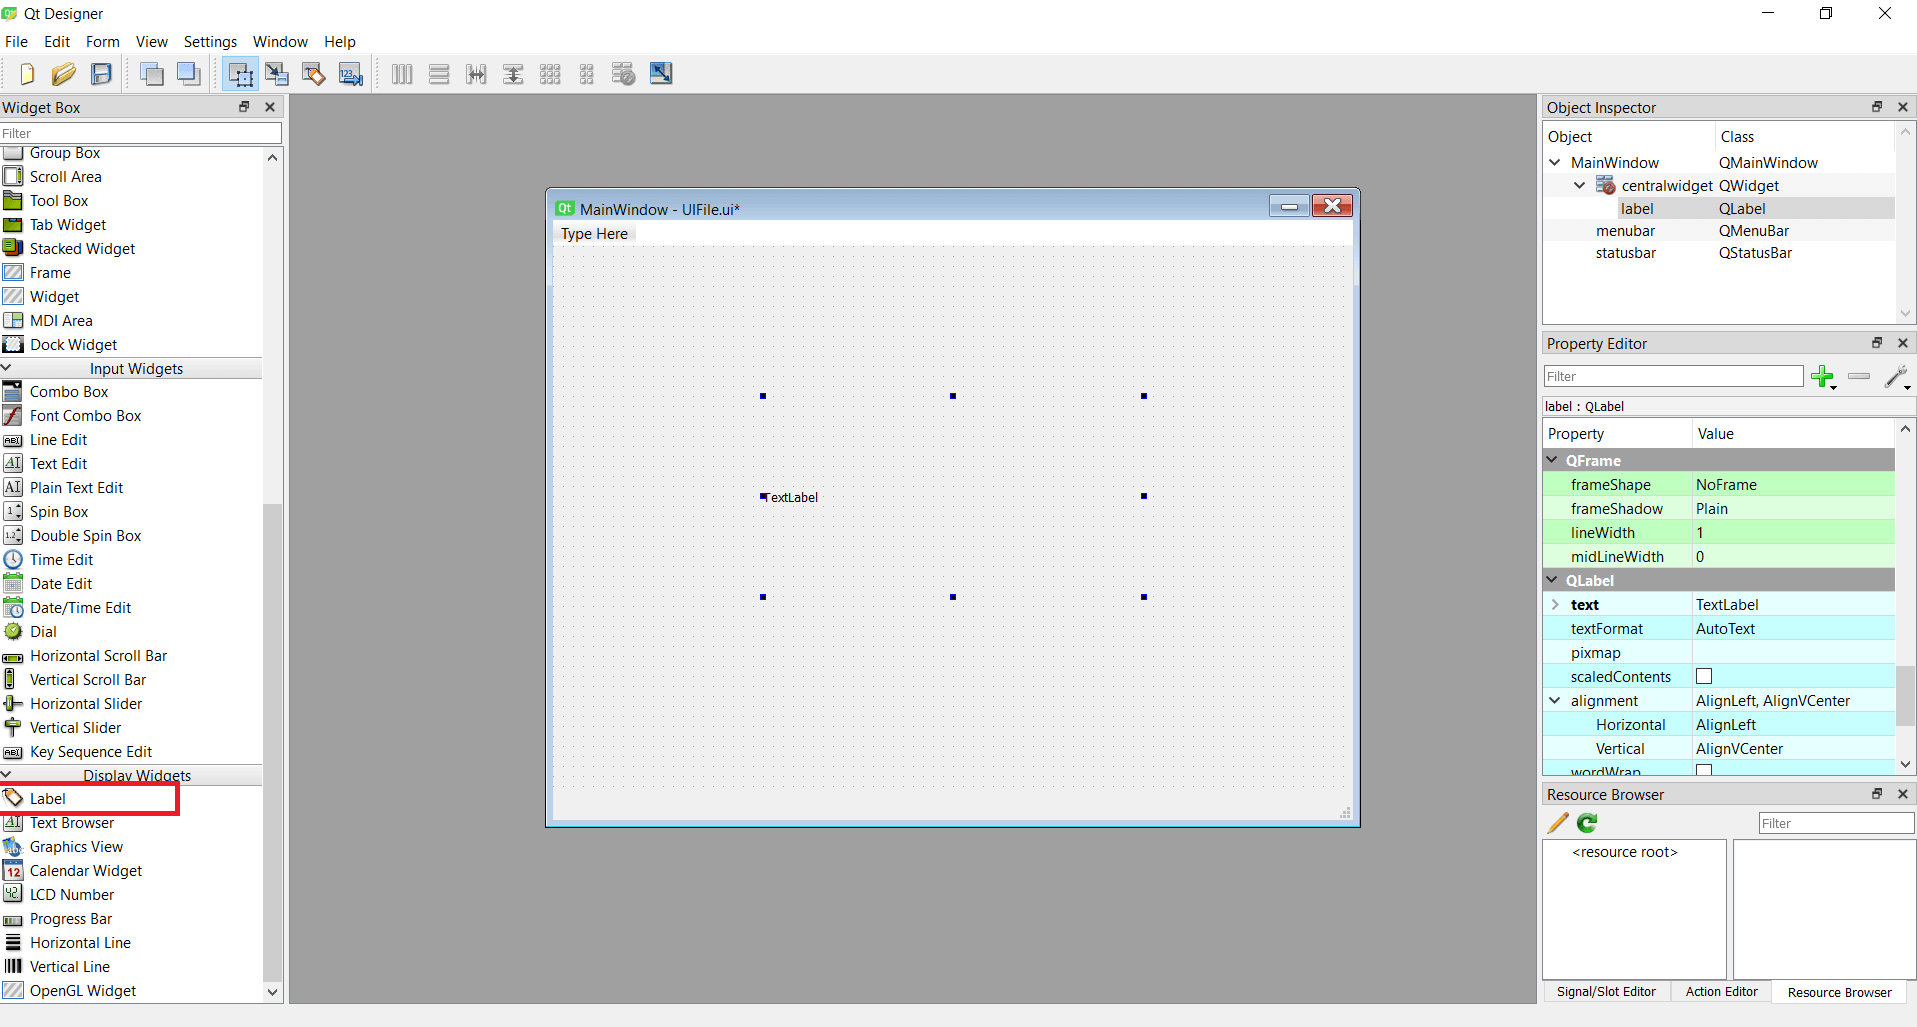 MainWindow with a single QLabel added
Next, with the Label selected, look in the right hand QLabel properties panel for the pixmap property (scroll down to the blue region). From the property editor dropdown select "Choose File…" and select an image file to insert.
As you can see, the image is inserted, but the image is kept at its original size, cropped to the boundaries of theQLabel box. You need to resize the QLabel to be able to see the entire image.
In the same controls panel, click to enable scaledContents.
When scaledContents is enabled the image is resized to the fit the bounding box of the QLabel widget. This shows the entire image at all times, although it does not respect the aspect ratio of the image if you resize the widget.
You can now save your UI to file (e.g. as mainwindow.ui).
To view the resulting UI, we can use the standard application template below. This loads the .ui file we've created (mainwindow.ui) creates the window and starts up the application.
import sys
from PySide6 import QtWidgets
from PySide6.QtUiTools import QUiLoader

loader = QUiLoader()
app = QtWidgets.QApplication(sys.argv)
window = loader.load("mainwindow.ui", None)
window.show()
app.exec()
Running the above code will create a window, with the image displayed in the middle.
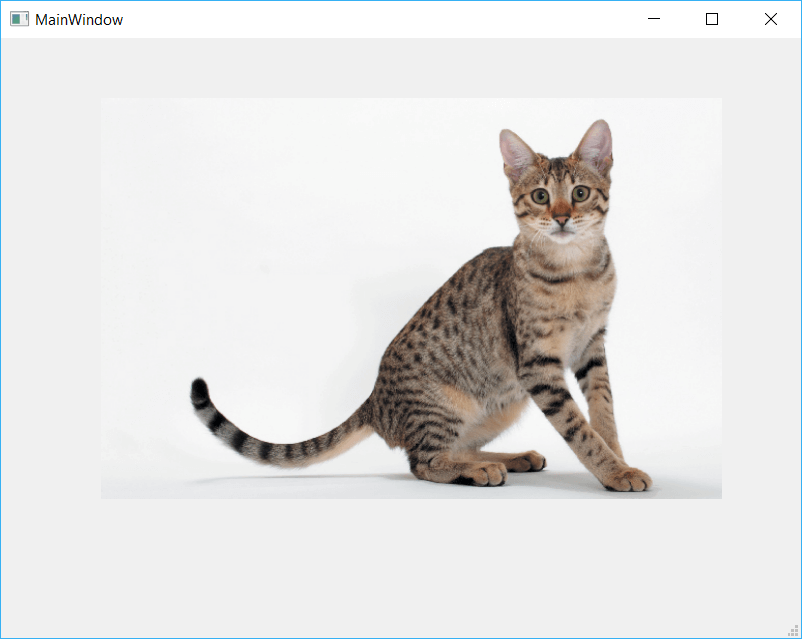 QtDesigner application showing a Cat
Instead of using Qt Designer, you might also want to show an image in your application through code. As before we use a QLabel widget and add a pixmap image to it. This is done using the QLabel method .setPixmap(). The full code is shown below.
import sys
from PySide6.QtGui import QPixmap
from PySide6.QtWidgets import QMainWindow, QApplication, QLabel

class MainWindow(QMainWindow):

    def __init__(self):
        super(MainWindow, self).__init__()
        self.title = "Image Viewer"
        self.setWindowTitle(self.title)

        label = QLabel(self)
        pixmap = QPixmap('cat.jpg')
        label.setPixmap(pixmap)
        self.setCentralWidget(label)
        self.resize(pixmap.width(), pixmap.height())


app = QApplication(sys.argv)
w = MainWindow()
w.show()
sys.exit(app.exec())
The block of code below shows the process of creating the QLabel, creating a QPixmap object from our file cat.jpg (passed as a file path), setting this QPixmap onto the QLabel with .setPixmap() and then finally resizing the window to fit the image.
label = QLabel(self)
pixmap = QPixmap('cat.jpg')
label.setPixmap(pixmap)
self.setCentralWidget(label)
self.resize(pixmap.width(), pixmap.height())
Launching this code will show a window with the cat photo displayed and the window sized to the size of the image.
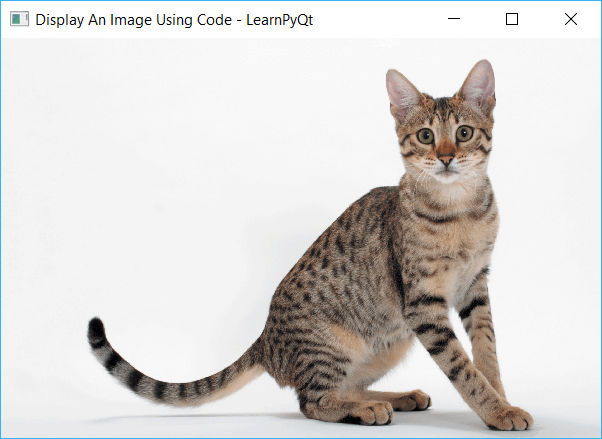 QMainWindow with Cat image displayed
Just as in Qt designer, you can call .setScaledContents(True) on your QLabel image to enable scaled mode, which resizes the image to fit the available space.
label = QLabel(self)
pixmap = QPixmap('cat.jpg')
label.setPixmap(pixmap)
label.setScaledContents(True)
self.setCentralWidget(label)
self.resize(pixmap.width(), pixmap.height())
Notice that you set the scaled state on the QLabel widget and not the image pixmap itself.
In this quick tutorial we've covered how to insert images into your Qt UIs using QLabel both from Qt Designer and directly from PySide6 code.
Managing the timing and context of signals and slots in multithreaded applications, especially those with a GUI, can be a complex task. The concept of deferred connection evaluation offers a nice and easy API, allowing for controlled and efficient signal-slot connections. This approach is particularly useful when dealing with worker threads and GUI threads.
A classic example where cross-thread signal-slot connections are useful is when we have a worker thread performing some computations or data collection and periodically emits signals. The GUI thread can connect to these signals and then display the data however it wishes. Graphical display usually must happen on the main thread and at specific times. Therefore, controlling exactly when the receiving slots get executed is of critical importance for correctness and performance.
Signals and slots are integral to event handling in C++ applications. Signals, emitted upon certain events or conditions, trigger connected slots (functions or methods) to respond accordingly. This framework is highly effective, but there are cases where immediate slot invocation is not ideal, such as in multithreaded applications where you might want to emit a signal in one thread and handle it in another, like a GUI event loop.
KDBindings is a header–only C++17 library that implements the signals and slots design pattern. In addition, KDBindings also provides an easy to use property and bindings system to enable reactive programming in C++. For more information, read this introduction blog.
In Qt, a signal that should be evaluated on a different thread will be executed by the event loop of that thread. As KDBindings doesn’t have its own event loop and needs to be able to integrate into any framework, we’re introducing the ConnectionEvaluator as our solution to those nuanced requirements. It allows for a deferred evaluation of connections, providing a much-needed flexibility in handling signal emissions.
In multithreaded environments, the immediate execution of slots in response to signals can lead to complications. Deferred connection evaluation addresses this by delaying the execution of a slot until a developer-determined point. This is achieved through a ConnectionEvaluator, akin to a BindingEvaluator, which governs when a slot is called.
We have introduced connectDeferred. This function, mirroring the standard connect method, takes a ConnectionEvaluator as its first argument, followed by the standard signal and slot parameters.
Signals emitted are queued in the ConnectionEvaluator instead of immediately triggering the slot. Developers can then execute these queued slots at an appropriate time, akin to the evaluateAll method in the BindingEvaluator.
1. Create a ConnectionEvaluator:
auto evaluator = std::make_shared<ConnectionEvaluator>(); // Shared ownership for proper lifetime management
2. Connect with Deferred Evaluation:
Signal<int> signal;
int value = 0;

auto connection = signal.connectDeferred(evaluator, [&value](int increment) {
value += increment;
});
3. Queue Deferred Connections
When the signal emits, connected slots aren’t executed immediately but are queued:
signal.emit(5); // The slot is queued, not executed.
4. Evaluate Deferred Connections
Execute the queued connections at the desired time:
evaluator.evaluateDeferredConnections(); // Executes the queued slot.
To illustrate how this enhanced signal/slot system works in a multithreaded scenario, let’s have a look at a usage example. Consider a scenario where a worker thread emits signals, but we want the connected slots to be executed in an event loop on the GUI thread:
Signal<int> workerSignal;
int guiValue = 0;
auto evaluator = std::make_shared<ConnectionEvaluator>();

// Connect a slot to the workerSignal with deferred evaluation
workerSignal.connectDeferred(evaluator, [&guiValue](int value) {
// This slot will be executed later in the GUI thread's event loop
guiValue += value;
});

// ... Worker thread emits signals ...

// In the GUI thread's event loop or at the right time
evaluator->evaluateDeferredConnections();

// The connected slot is now executed, and guiValue is updated
In this example, the connectDeferred function allows us to queue the connection for deferred execution, and the ConnectionEvaluator determines when it should be invoked. This level of control enables more sophisticated and responsive applications.
In simple terms, the ConnectionEvaluator is a valuable tool we’ve added to KDBindings. It lets you decide when exactly your connections should ‘wake up’ and do their jobs. This is especially helpful in complex applications where you want to make sure that certain tasks are performed at the right time and in the right order (preferably in multithreading applications). Think of it like having a remote control for your connections, allowing you to press ‘play’ whenever you’re ready.
It may also be worthwhile mentioning that we will be integrating this feature into the KDFoundation library and event loop in the KDUtils GitHub repo. Additionally, it’s important to note that it could easily be integrated into any application or framework, regardless of whether it utilizes an event loop.
If you like this article and want to read similar material, consider subscribing via our RSS feed.
Subscribe to KDAB TV for similar informative short video content.
KDAB provides market leading software consulting and development services and training in Qt, C++ and 3D/OpenGL. Contact us.
The post Introducing the ConnectionEvaluator in KDBindings appeared first on KDAB.
I had an interesting question from a reader of my PySide6 book, about how to handle dragging and dropping of widgets in a container showing the dragged widget as it is moved.
I'm interested in managing movement of a QWidget with mouse in a container. I've implemented the application with drag & drop, exchanging the position of buttons, but I want to show the motion of
QPushButton, like what you see in Qt Designer. Dragging a widget should show the widget itself, not just the mouse pointer.
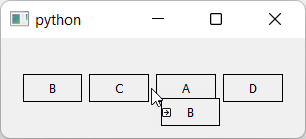
First, we'll implement the simple case which drags widgets without showing anything extra. Then we can extend it to answer the question. By the end of this quick tutorial we'll have a generic drag drop implementation which looks like the following.
We'll start with a simple application which creates a window using QWidget and places a series of QPushButton widgets into it.
You can substitute QPushButton for any other widget you like, e.g. QLabel. Any widget can have drag behavior implemented on it, although some input widgets will not work well as we capture the mouse events for the drag.
from PySide6.QtWidgets import QApplication, QHBoxLayout, QPushButton, QWidget


class Window(QWidget):
    def __init__(self):
        super().__init__()

        self.blayout = QHBoxLayout()
        for l in ["A", "B", "C", "D"]:
            btn = QPushButton(l)
            self.blayout.addWidget(btn)

        self.setLayout(self.blayout)


app = QApplication([])
w = Window()
w.show()

app.exec()
If you run this you should see something like this.
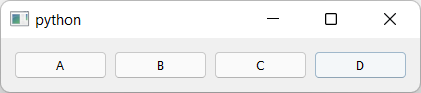 The series of
 QPushButton widgets in a horizontal layout.
Here we're creating a window, but the Window widget is subclassed from QWidget, meaning you can add this widget to any other layout. See later for an example of a generic object sorting widget.
QPushButton objects aren't usually draggable, so to handle the mouse movements and initiate a drag we need to implement a subclass. We can add the following to the top of the file.
from PySide6.QtCore import QMimeData, Qt
from PySide6.QtGui import QDrag
from PySide6.QtWidgets import QApplication, QHBoxLayout, QPushButton, QWidget


class DragButton(QPushButton):
    def mouseMoveEvent(self, e):
        if e.buttons() == Qt.MouseButton.LeftButton:
            drag = QDrag(self)
            mime = QMimeData()
            drag.setMimeData(mime)
            drag.exec(Qt.DropAction.MoveAction)
We implement a mouseMoveEvent which accepts the single e parameter of the event. We check to see if the left mouse button is pressed on this event -- as it would be when dragging -- and then initiate a drag. To start a drag, we create a QDrag object, passing in self to give us access later to the widget that was dragged. We also must pass in mime data. This is used for including information about what is dragged, particularly for passing data between applications. However, as here, it is fine to leave this empty.
Finally, we initiate a drag by calling drag.exec_(Qt.MoveAction). As with dialogs exec_() starts a new event loop, blocking the main loop until the drag is complete. The parameter Qt.MoveAction tells the drag handler what type of operation is happening, so it can show the appropriate icon tip to the user.
You can update the main window code to use our new DragButton class as follows.
class Window(QWidget):
    def __init__(self):
        super().__init__()
        self.setAcceptDrops(True)

        self.blayout = QHBoxLayout()
        for l in ["A", "B", "C", "D"]:
            btn = DragButton(l)
            self.blayout.addWidget(btn)

        self.setLayout(self.blayout)

    def dragEnterEvent(self, e):
        e.accept()
If you run the code now, you can drag the buttons, but you'll notice the drag is forbidden.
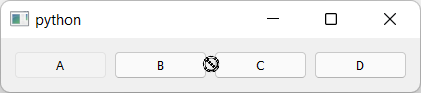 Dragging of the widget starts but is forbidden.
What's happening? The mouse movement is being detected by our DragButton object and the drag started, but the main window does not accept drag & drop.
To fix this we need to enable drops on the window and implement dragEnterEvent to actually accept them.
class Window(QWidget):
    def __init__(self):
        super().__init__()
        self.setAcceptDrops(True)

        self.blayout = QHBoxLayout()
        for l in ["A", "B", "C", "D"]:
            btn = DragButton(l)
            self.blayout.addWidget(btn)

        self.setLayout(self.blayout)

    def dragEnterEvent(self, e):
        e.accept()
If you run this now, you'll see the drag is now accepted and you see the move icon. This indicates that the drag has started and been accepted by the window we're dragging onto. The icon shown is determined by the action we pass when calling drag.exec_().
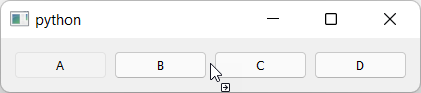 Dragging of the widget starts and is accepted, showing a move icon.
Releasing the mouse button during a drag drop operation triggers a dropEvent on the widget you're currently hovering the mouse over (if it is configured to accept drops). In our case that's the window. To handle the move we need to implement the code to do this in our dropEvent method.
The drop event contains the position the mouse was at when the button was released & the drop triggered. We can use this to determine where to move the widget to.
To determine where to place the widget, we iterate over all the widgets in the layout, until we find one who's x position is greater than that of the mouse pointer. If so then when insert the widget directly to the left of this widget and exit the loop.
If we get to the end of the loop without finding a match, we must be dropping past the end of the existing items, so we increment n one further (in the else: block below).
    def dropEvent(self, e):
        pos = e.position()
        widget = e.source()
        self.blayout.removeWidget(widget)

        for n in range(self.blayout.count()):
            # Get the widget at each index in turn.
            w = self.blayout.itemAt(n).widget()
            if pos.x() < w.x():
                # We didn't drag past this widget.
                # insert to the left of it.
                break
        else:
            # We aren't on the left hand side of any widget,
            # so we're at the end. Increment 1 to insert after.
            n += 1

        self.blayout.insertWidget(n, widget)

        e.accept()
The effect of this is that if you drag 1 pixel past the start of another widget the drop will happen to the right of it, which is a bit confusing. To fix this we can adjust the cut off to use the middle of the widget using if pos.x() < w.x() + w.size().width() // 2: -- that is x + half of the width.
    def dropEvent(self, e):
        pos = e.position()
        widget = e.source()
        self.blayout.removeWidget(widget)

        for n in range(self.blayout.count()):
            # Get the widget at each index in turn.
            w = self.blayout.itemAt(n).widget()
            if pos.x() < w.x() + w.size().width() // 2:
                # We didn't drag past this widget.
                # insert to the left of it.
                break
        else:
            # We aren't on the left hand side of any widget,
            # so we're at the end. Increment 1 to insert after.
            n += 1

        self.blayout.insertWidget(n, widget)

        e.accept()
The complete working drag-drop code is shown below.
from PySide6.QtCore import QMimeData, Qt
from PySide6.QtGui import QDrag
from PySide6.QtWidgets import QApplication, QHBoxLayout, QPushButton, QWidget


class DragButton(QPushButton):
    def mouseMoveEvent(self, e):
        if e.buttons() == Qt.MouseButton.LeftButton:
            drag = QDrag(self)
            mime = QMimeData()
            drag.setMimeData(mime)
            drag.exec(Qt.DropAction.MoveAction)


class Window(QWidget):
    def __init__(self):
        super().__init__()
        self.setAcceptDrops(True)

        self.blayout = QHBoxLayout()
        for l in ["A", "B", "C", "D"]:
            btn = DragButton(l)
            self.blayout.addWidget(btn)

        self.setLayout(self.blayout)

    def dragEnterEvent(self, e):
        e.accept()

    def dropEvent(self, e):
        pos = e.position()
        widget = e.source()
        self.blayout.removeWidget(widget)

        for n in range(self.blayout.count()):
            # Get the widget at each index in turn.
            w = self.blayout.itemAt(n).widget()
            if pos.x() < w.x() + w.size().width() // 2:
                # We didn't drag past this widget.
                # insert to the left of it.
                break
        else:
            # We aren't on the left hand side of any widget,
            # so we're at the end. Increment 1 to insert after.
            n += 1

        self.blayout.insertWidget(n, widget)

        e.accept()


app = QApplication([])
w = Window()
w.show()

app.exec()
We now have a working drag & drop implementation. Next we'll move onto improving the UX by showing the drag visually. First we'll add support for showing the button being dragged next to the mouse point as it is dragged. That way the user knows exactly what it is they are dragging.
Qt's QDrag handler natively provides a mechanism for showing dragged objects which we can use. We can update our DragButton class to pass a pixmap image to QDrag and this will be displayed under the mouse pointer as the drag occurs. To show the widget, we just need to get a QPixmap of the widget we're dragging.
from PySide6.QtCore import QMimeData, Qt
from PySide6.QtGui import QDrag
from PySide6.QtWidgets import QApplication, QHBoxLayout, QPushButton, QWidget


class DragButton(QPushButton):
    def mouseMoveEvent(self, e):
        if e.buttons() == Qt.MouseButton.LeftButton:
            drag = QDrag(self)
            mime = QMimeData()
            drag.setMimeData(mime)
            drag.exec(Qt.DropAction.MoveAction)
To create the pixmap we create a QPixmap object passing in the size of the widget this event is fired on with self.size(). This creates an empty pixmap which we can then pass into self.render to render -- or draw -- the current widget onto it. That's it. Then we set the resulting pixmap on the drag object.
If you run the code with this modification you'll see something like the following --
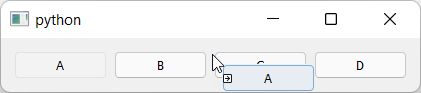 Dragging of the widget showing the dragged widget.
We now have a working drag and drop behavior implemented on our window. We can take this a step further and implement a generic drag drop widget which allows us to sort arbitrary objects. In the code below we've created a new widget DragWidget which can be added to any window.
You can add items -- instances of DragItem -- which you want to be sorted, as well as setting data on them. When items are re-ordered the new order is emitted as a signal orderChanged.
from PySide6.QtCore import QMimeData, Qt, Signal
from PySide6.QtGui import QDrag, QPixmap
from PySide6.QtWidgets import (
    QApplication,
    QHBoxLayout,
    QLabel,
    QMainWindow,
    QVBoxLayout,
    QWidget,
)


class DragItem(QLabel):
    def __init__(self, *args, **kwargs):
        super().__init__(*args, **kwargs)
        self.setContentsMargins(25, 5, 25, 5)
        self.setAlignment(Qt.AlignmentFlag.AlignCenter)
        self.setStyleSheet("border: 1px solid black;")
        # Store data separately from display label, but use label for default.
        self.data = self.text()

    def set_data(self, data):
        self.data = data

    def mouseMoveEvent(self, e):
        if e.buttons() == Qt.MouseButton.LeftButton:
            drag = QDrag(self)
            mime = QMimeData()
            drag.setMimeData(mime)

            pixmap = QPixmap(self.size())
            self.render(pixmap)
            drag.setPixmap(pixmap)

            drag.exec(Qt.DropAction.MoveAction)


class DragWidget(QWidget):
    """
    Generic list sorting handler.
    """

    orderChanged = Signal(list)

    def __init__(self, *args, orientation=Qt.Orientation.Vertical, **kwargs):
        super().__init__()
        self.setAcceptDrops(True)

        # Store the orientation for drag checks later.
        self.orientation = orientation

        if self.orientation == Qt.Orientation.Vertical:
            self.blayout = QVBoxLayout()
        else:
            self.blayout = QHBoxLayout()

        self.setLayout(self.blayout)

    def dragEnterEvent(self, e):
        e.accept()

    def dropEvent(self, e):
        pos = e.position()
        widget = e.source()
        self.blayout.removeWidget(widget)

        for n in range(self.blayout.count()):
            # Get the widget at each index in turn.
            w = self.blayout.itemAt(n).widget()
            if self.orientation == Qt.Orientation.Vertical:
                # Drag drop vertically.
                drop_here = pos.y() < w.y() + w.size().height() // 2
            else:
                # Drag drop horizontally.
                drop_here = pos.x() < w.x() + w.size().width() // 2

            if drop_here:
                break

        else:
            # We aren't on the left hand/upper side of any widget,
            # so we're at the end. Increment 1 to insert after.
            n += 1

        self.blayout.insertWidget(n, widget)
        self.orderChanged.emit(self.get_item_data())

        e.accept()

    def add_item(self, item):
        self.blayout.addWidget(item)

    def get_item_data(self):
        data = []
        for n in range(self.blayout.count()):
            # Get the widget at each index in turn.
            w = self.blayout.itemAt(n).widget()
            data.append(w.data)
        return data


class MainWindow(QMainWindow):
    def __init__(self):
        super().__init__()
        self.drag = DragWidget(orientation=Qt.Orientation.Vertical)
        for n, l in enumerate(["A", "B", "C", "D"]):
            item = DragItem(l)
            item.set_data(n)  # Store the data.
            self.drag.add_item(item)

        # Print out the changed order.
        self.drag.orderChanged.connect(print)

        container = QWidget()
        layout = QVBoxLayout()
        layout.addStretch(1)
        layout.addWidget(self.drag)
        layout.addStretch(1)
        container.setLayout(layout)

        self.setCentralWidget(container)


app = QApplication([])
w = MainWindow()
w.show()

app.exec()
 Generic drag-drop sorting in horizontal orientation.
You'll notice that when creating the item, you can set the label by passing it in as a parameter (just like for a normal QLabel which we've subclassed from). But you can also set a data value, which is the internal value of this item -- this is what will be emitted when the order changes, or if you call get_item_data yourself. This separates the visual representation from what is actually being sorted, meaning you can use this to sort anything not just strings.
In the example above we're passing in the enumerated index as the data, so dragging will output (via the print connected to orderChanged) something like:
[1, 0, 2, 3]
[1, 2, 0, 3]
[1, 0, 2, 3]
[1, 2, 0, 3]
If you remove the item.set_data(n) you'll see the labels emitted on changes.
['B', 'A', 'C', 'D']
['B', 'C', 'A', 'D']
We've also implemented orientation onto the DragWidget using the Qt built in flags Qt.Orientation.Vertical or Qt.Orientation.Horizontal. This setting this allows you sort items either vertically or horizontally -- the calculations are handled for both directions.
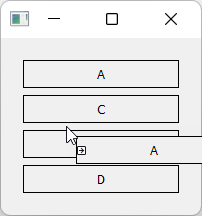 Generic drag-drop sorting in vertical orientation.
If you experiment with the drag-drop tool above you'll notice that it doesn't feel completely intuitive. When dragging you don't know where an item will be inserted until you drop it. If it ends up in the wrong place, you'll then need to pick it up and re-drop it again, using guesswork to get it right.
With a bit of practice you can get the hang of it, but it would be nicer to make the behavior immediately obvious for users. Many drag-drop interfaces solve this problem by showing a preview of where the item will be dropped while dragging -- either by showing the item in the place where it will be dropped, or showing some kind of placeholder.
In this final section we'll implement this type of drag and drop preview indicator.
The first step is to define our target indicator. This is just another label, which in our example is empty, with custom styles applied to make it have a solid "shadow" like background. This makes it obviously different to the items in the list, so it stands out as something distinct.
from PySide6.QtCore import QMimeData, Qt, Signal
from PySide6.QtGui import QDrag, QPixmap
from PySide6.QtWidgets import (
    QApplication,
    QHBoxLayout,
    QLabel,
    QMainWindow,
    QVBoxLayout,
    QWidget,
)


class DragTargetIndicator(QLabel):
    def __init__(self, parent=None):
        super().__init__(parent)
        self.setContentsMargins(25, 5, 25, 5)
        self.setStyleSheet(
            "QLabel { background-color: #ccc; border: 1px solid black; }"
        )
We've copied the contents margins from the items in the list. If you change your list items, remember to also update the indicator dimensions to match.
The drag item is unchanged, but we need to implement some additional behavior on our DragWidget to add the target, control showing and moving it.
First we'll add the drag target indicator to the layout on our DragWidget. This is hidden to begin with, but will be shown during the drag.
class DragWidget(QWidget):
    """
    Generic list sorting handler.
    """

    orderChanged = Signal(list)

    def __init__(self, *args, orientation=Qt.Orientation.Vertical, **kwargs):
        super().__init__()
        self.setAcceptDrops(True)

        # Store the orientation for drag checks later.
        self.orientation = orientation

        if self.orientation == Qt.Orientation.Vertical:
            self.blayout = QVBoxLayout()
        else:
            self.blayout = QHBoxLayout()

        # Add the drag target indicator. This is invisible by default,
        # we show it and move it around while the drag is active.
        self._drag_target_indicator = DragTargetIndicator()
        self.blayout.addWidget(self._drag_target_indicator)
        self._drag_target_indicator.hide()

        self.setLayout(self.blayout)
Next we modify the DragWidget.dragMoveEvent to show the drag target indicator. We show it by inserting it into the layout and then calling .show -- inserting a widget which is already in a layout will move it. We also hide the original item which is being dragged.
In the earlier examples we determined the position on drop by removing the widget being dragged, and then iterating over what is left. Because we now need to calculate the drop location before the drop, we take a different approach.
If we wanted to do it the same way, we'd need to remove the item on drag start, hold onto it and implement re-inserting at it's old position on drag fail. That's a lot of work.
Instead, the dragged item is left in place and hidden during move.
    def dragMoveEvent(self, e):
        # Find the correct location of the drop target, so we can move it there.
        index = self._find_drop_location(e)
        if index is not None:
            # Inserting moves the item if its alreaady in the layout.
            self.blayout.insertWidget(index, self._drag_target_indicator)
            # Hide the item being dragged.
            e.source().hide()
            # Show the target.
            self._drag_target_indicator.show()
        e.accept()
The method self._find_drop_location finds the index where the drag target will be shown (or the item dropped when the mouse released). We'll implement that next.
The calculation of the drop location follows the same pattern as before. We iterate over the items in the layout and calculate whether our mouse drop location is to the left of each widget. If it isn't to the left of any widget, we drop on the far right.
    def _find_drop_location(self, e):
        pos = e.position()
        spacing = self.blayout.spacing() / 2

        for n in range(self.blayout.count()):
            # Get the widget at each index in turn.
            w = self.blayout.itemAt(n).widget()

            if self.orientation == Qt.Orientation.Vertical:
                # Drag drop vertically.
                drop_here = (
                    pos.y() >= w.y() - spacing
                    and pos.y() <= w.y() + w.size().height() + spacing
                )
            else:
                # Drag drop horizontally.
                drop_here = (
                    pos.x() >= w.x() - spacing
                    and pos.x() <= w.x() + w.size().width() + spacing
                )

            if drop_here:
                # Drop over this target.
                break

        return n
The drop location n is returned for use in the dragMoveEvent to place the drop target indicator.
Next wee need to update the get_item_data handler to ignore the drop target indicator. To do this we check w against self._drag_target_indicator and skip if it is the same. With this change the method will work as expected.
    def get_item_data(self):
        data = []
        for n in range(self.blayout.count()):
            # Get the widget at each index in turn.
            w = self.blayout.itemAt(n).widget()
            if w != self._drag_target_indicator:
                # The target indicator has no data.
                data.append(w.data)
        return data
If you run the code a this point the drag behavior will work as expected. But if you drag the widget outside of the window and drop you'll notice a problem: the target indicator will stay in place, but dropping the item won't drop the item in that position (the drop will be cancelled).
To fix that we need to implement a dragLeaveEvent which hides the indicator.
    def dragLeaveEvent(self, e):
        self._drag_target_indicator.hide()
        e.accept()
With those changes, the drag-drop behavior should be working as intended. The complete code is shown below.
from PySide6.QtCore import QMimeData, Qt, Signal
from PySide6.QtGui import QDrag, QPixmap
from PySide6.QtWidgets import (
    QApplication,
    QHBoxLayout,
    QLabel,
    QMainWindow,
    QVBoxLayout,
    QWidget,
)


class DragTargetIndicator(QLabel):
    def __init__(self, parent=None):
        super().__init__(parent)
        self.setContentsMargins(25, 5, 25, 5)
        self.setStyleSheet(
            "QLabel { background-color: #ccc; border: 1px solid black; }"
        )


class DragItem(QLabel):
    def __init__(self, *args, **kwargs):
        super().__init__(*args, **kwargs)
        self.setContentsMargins(25, 5, 25, 5)
        self.setAlignment(Qt.AlignmentFlag.AlignCenter)
        self.setStyleSheet("border: 1px solid black;")
        # Store data separately from display label, but use label for default.
        self.data = self.text()

    def set_data(self, data):
        self.data = data

    def mouseMoveEvent(self, e):
        if e.buttons() == Qt.MouseButton.LeftButton:
            drag = QDrag(self)
            mime = QMimeData()
            drag.setMimeData(mime)

            pixmap = QPixmap(self.size())
            self.render(pixmap)
            drag.setPixmap(pixmap)

            drag.exec(Qt.DropAction.MoveAction)
            self.show() # Show this widget again, if it's dropped outside.


class DragWidget(QWidget):
    """
    Generic list sorting handler.
    """

    orderChanged = Signal(list)

    def __init__(self, *args, orientation=Qt.Orientation.Vertical, **kwargs):
        super().__init__()
        self.setAcceptDrops(True)

        # Store the orientation for drag checks later.
        self.orientation = orientation

        if self.orientation == Qt.Orientation.Vertical:
            self.blayout = QVBoxLayout()
        else:
            self.blayout = QHBoxLayout()

        # Add the drag target indicator. This is invisible by default,
        # we show it and move it around while the drag is active.
        self._drag_target_indicator = DragTargetIndicator()
        self.blayout.addWidget(self._drag_target_indicator)
        self._drag_target_indicator.hide()

        self.setLayout(self.blayout)

    def dragEnterEvent(self, e):
        e.accept()

    def dragLeaveEvent(self, e):
        self._drag_target_indicator.hide()
        e.accept()

    def dragMoveEvent(self, e):
        # Find the correct location of the drop target, so we can move it there.
        index = self._find_drop_location(e)
        if index is not None:
            # Inserting moves the item if its alreaady in the layout.
            self.blayout.insertWidget(index, self._drag_target_indicator)
            # Hide the item being dragged.
            e.source().hide()
            # Show the target.
            self._drag_target_indicator.show()
        e.accept()

    def dropEvent(self, e):
        widget = e.source()
        # Use drop target location for destination, then remove it.
        self._drag_target_indicator.hide()
        index = self.blayout.indexOf(self._drag_target_indicator)
        if index is not None:
            self.blayout.insertWidget(index, widget)
            self.orderChanged.emit(self.get_item_data())
            widget.show()
            self.blayout.activate()
        e.accept()

    def _find_drop_location(self, e):
        pos = e.position()
        spacing = self.blayout.spacing() / 2

        for n in range(self.blayout.count()):
            # Get the widget at each index in turn.
            w = self.blayout.itemAt(n).widget()

            if self.orientation == Qt.Orientation.Vertical:
                # Drag drop vertically.
                drop_here = (
                    pos.y() >= w.y() - spacing
                    and pos.y() <= w.y() + w.size().height() + spacing
                )
            else:
                # Drag drop horizontally.
                drop_here = (
                    pos.x() >= w.x() - spacing
                    and pos.x() <= w.x() + w.size().width() + spacing
                )

            if drop_here:
                # Drop over this target.
                break

        return n

    def add_item(self, item):
        self.blayout.addWidget(item)

    def get_item_data(self):
        data = []
        for n in range(self.blayout.count()):
            # Get the widget at each index in turn.
            w = self.blayout.itemAt(n).widget()
            if w != self._drag_target_indicator:
                # The target indicator has no data.
                data.append(w.data)
        return data


class MainWindow(QMainWindow):
    def __init__(self):
        super().__init__()
        self.drag = DragWidget(orientation=Qt.Orientation.Vertical)
        for n, l in enumerate(["A", "B", "C", "D"]):
            item = DragItem(l)
            item.set_data(n)  # Store the data.
            self.drag.add_item(item)

        # Print out the changed order.
        self.drag.orderChanged.connect(print)

        container = QWidget()
        layout = QVBoxLayout()
        layout.addStretch(1)
        layout.addWidget(self.drag)
        layout.addStretch(1)
        container.setLayout(layout)

        self.setCentralWidget(container)


app = QApplication([])
w = MainWindow()
w.show()

app.exec()
If you run this example on macOS you may notice that the widget drag preview (the QPixmap created on DragItem) is a bit blurry. On high-resolution screens you need to set the device pixel ratio and scale up the pixmap when you create it. Below is a modified DragItem class which does this.
Update DragItem to support high resolution screens.
class DragItem(QLabel):
    def __init__(self, *args, **kwargs):
        super().__init__(*args, **kwargs)
        self.setContentsMargins(25, 5, 25, 5)
        self.setAlignment(Qt.AlignmentFlag.AlignCenter)
        self.setStyleSheet("border: 1px solid black;")
        # Store data separately from display label, but use label for default.
        self.data = self.text()

    def set_data(self, data):
        self.data = data

    def mouseMoveEvent(self, e):
        if e.buttons() == Qt.MouseButton.LeftButton:
            drag = QDrag(self)
            mime = QMimeData()
            drag.setMimeData(mime)

            # Render at x2 pixel ratio to avoid blur on Retina screens.
            pixmap = QPixmap(self.size().width() * 2, self.size().height() * 2)
            pixmap.setDevicePixelRatio(2)
            self.render(pixmap)
            drag.setPixmap(pixmap)

            drag.exec(Qt.DropAction.MoveAction)
            self.show() # Show this widget again, if it's dropped outside.
That's it! We've created a generic drag-drop handled which can be added to any projects where you need to be able to reposition items within a list. You should feel free to experiment with the styling of the drag items and targets as this won't affect the behavior.
For the 14th time, KDAB exhibited at Embedded World – The meeting place for the global embedded community! Here, as expected, you got three days of pioneering technologies, solutions, new ideas, and intelligent concepts.
Embedded World took place in Nürnberg, Germany from 9 – 11 April 2024 and the KDAB booth was in Hall 4-302 showcasing outstanding demos featuring Qt, C++, 3D, Slint, Rust, and Flutter.
Visitors could use the code ew24518375 to get a free ticket.
Here are the demos that you will have found at our booth, including an interstellar navigation interface built with Flutter…
Interactive 3D rendering using Qt3D
KDAB helped iDig, a provider of excavator machine controls, implement 3D-related work: loading CAD files, mesh data structures and algorithms, and rendering.
![]()
High-quality touch-based interface based on Slint
KDAB and tQCS used Slint, a UI toolkit built with Rust, to overhaul the user interface of SK Signet’s flagship Electric Vehicle charger.
![]()
Multi Value Measurements device brought to market readiness
Starting from a legacy codebase, KDAB implemented a multi-measurement channel architecture, extended the UI, and improved stability and performance to reach production quality. The device helps with verification and quality control processes with sensitive measurements in cramped spaces.
![]()
Integration for C++ and Rust applications
KDAB supports and maintains CXX-Qt. A set of Rust crates for creating bidirectional Rust ⇄ C++ bindings with Qt. It can be used to integrate Rust into C++ applications using CMake or used to build Rust applications with Cargo.
![]()
Flutter on embedded hardware using flutter-pi and CAN-Bus Integration
To demonstrate the capabilities of Flutter on embedded we developed an interstellar navigation interface.
A selection of useful developer tools for debugging and profiling
GammaRay: Remote Embedded Introspection
Using GammaRay, we introspect a Qt-based game at runtime on the SteamDeck (which is powered by KDE Plasma).
Further, there are also Hotspot, Heaptrack, and Clazy, which are all useful helpers to make your code more performant.
Last but not least, for those needing an advanced docking solution for Qt applications, the KDDockWidgets demo.
![]()
Free four-part guide for Designing your first Embedded Linux device
Embedded Linux is widely used on embedded devices. Still, it is not trivial to implement. We have created a comprehensive guide, starting from framing the development process, via choosing the software stack and the hardware to setting up your development environment.
In the booth, we had a digital brochure kiosk with access to all KDAB brochures, whitepapers, and articles. Here, you could easily scan the material you were interested in with your phone or grab a physical copy from our selection.
Whether you like to dive into our multi-part series “Best Practices for Embedded Development” or “Building Hybrid Rust and C/C++ Applications”? KDAB has got you covered.
We invited folk to visit Embedded World free of charge with our voucher code ew24518375.

The post Meet KDAB at Embedded World 2024 – Hall 4-302 appeared first on KDAB.
I had an interesting question from a reader of my PyQt6 book, about how to handle dragging and dropping of widgets in a container showing the dragged widget as it is moved.
I'm interested in managing movement of a QWidget with mouse in a container. I've implemented the application with drag & drop, exchanging the position of buttons, but I want to show the motion of
QPushButton, like what you see in Qt Designer. Dragging a widget should show the widget itself, not just the mouse pointer.
First, we'll implement the simple case which drags widgets without showing anything extra. Then we can extend it to answer the question. By the end of this quick tutorial we'll have a generic drag drop implementation which looks like the following.
We'll start with a simple application which creates a window using QWidget and places a series of QPushButton widgets into it.
You can substitute QPushButton for any other widget you like, e.g. QLabel. Any widget can have drag behavior implemented on it, although some input widgets will not work well as we capture the mouse events for the drag.
from PyQt6.QtWidgets import QApplication, QHBoxLayout, QPushButton, QWidget


class Window(QWidget):
    def __init__(self):
        super().__init__()

        self.blayout = QHBoxLayout()
        for l in ["A", "B", "C", "D"]:
            btn = QPushButton(l)
            self.blayout.addWidget(btn)

        self.setLayout(self.blayout)


app = QApplication([])
w = Window()
w.show()

app.exec()
If you run this you should see something like this.
The series of QPushButton widgets in a horizontal layout.
Here we're creating a window, but the Window widget is subclassed from QWidget, meaning you can add this widget to any other layout. See later for an example of a generic object sorting widget.
QPushButton objects aren't usually draggable, so to handle the mouse movements and initiate a drag we need to implement a subclass. We can add the following to the top of the file.
from PyQt6.QtCore import QMimeData, Qt
from PyQt6.QtGui import QDrag
from PyQt6.QtWidgets import QApplication, QHBoxLayout, QPushButton, QWidget


class DragButton(QPushButton):
    def mouseMoveEvent(self, e):
        if e.buttons() == Qt.MouseButton.LeftButton:
            drag = QDrag(self)
            mime = QMimeData()
            drag.setMimeData(mime)
            drag.exec(Qt.DropAction.MoveAction)
We implement a mouseMoveEvent which accepts the single e parameter of the event. We check to see if the left mouse button is pressed on this event -- as it would be when dragging -- and then initiate a drag. To start a drag, we create a QDrag object, passing in self to give us access later to the widget that was dragged. We also must pass in mime data. This is used for including information about what is dragged, particularly for passing data between applications. However, as here, it is fine to leave this empty.
Finally, we initiate a drag by calling drag.exec_(Qt.MoveAction). As with dialogs exec_() starts a new event loop, blocking the main loop until the drag is complete. The parameter Qt.MoveAction tells the drag handler what type of operation is happening, so it can show the appropriate icon tip to the user.
You can update the main window code to use our new DragButton class as follows.
class Window(QWidget):
    def __init__(self):
        super().__init__()

        self.blayout = QHBoxLayout()
        for l in ["A", "B", "C", "D"]:
            btn = DragButton(l)
            self.blayout.addWidget(btn)

        self.setLayout(self.blayout)
If you run the code now, you can drag the buttons, but you'll notice the drag is forbidden.
Dragging of the widget starts but is forbidden.
What's happening? The mouse movement is being detected by our DragButton object and the drag started, but the main window does not accept drag & drop.
To fix this we need to enable drops on the window and implement dragEnterEvent to actually accept them.
class Window(QWidget):
    def __init__(self):
        super().__init__()
        self.setAcceptDrops(True)

        self.blayout = QHBoxLayout()
        for l in ["A", "B", "C", "D"]:
            btn = DragButton(l)
            self.blayout.addWidget(btn)

        self.setLayout(self.blayout)

    def dragEnterEvent(self, e):
        e.accept()
If you run this now, you'll see the drag is now accepted and you see the move icon. This indicates that the drag has started and been accepted by the window we're dragging onto. The icon shown is determined by the action we pass when calling drag.exec_().
Dragging of the widget starts and is accepted, showing a move icon.
Releasing the mouse button during a drag drop operation triggers a dropEvent on the widget you're currently hovering the mouse over (if it is configured to accept drops). In our case that's the window. To handle the move we need to implement the code to do this in our dropEvent method.
The drop event contains the position the mouse was at when the button was released & the drop triggered. We can use this to determine where to move the widget to.
To determine where to place the widget, we iterate over all the widgets in the layout, until we find one who's x position is greater than that of the mouse pointer. If so then when insert the widget directly to the left of this widget and exit the loop.
If we get to the end of the loop without finding a match, we must be dropping past the end of the existing items, so we increment n one further (in the else: block below).
    def dropEvent(self, e):
        pos = e.position()
        widget = e.source()
        self.blayout.removeWidget(widget)

        for n in range(self.blayout.count()):
            # Get the widget at each index in turn.
            w = self.blayout.itemAt(n).widget()
            if pos.x() < w.x():
                # We didn't drag past this widget.
                # insert to the left of it.
                break
        else:
            # We aren't on the left hand side of any widget,
            # so we're at the end. Increment 1 to insert after.
            n += 1
        self.blayout.insertWidget(n, widget)

        e.accept()
The effect of this is that if you drag 1 pixel past the start of another widget the drop will happen to the right of it, which is a bit confusing. To fix this we can adjust the cut off to use the middle of the widget using if pos.x() < w.x() + w.size().width() // 2: -- that is x + half of the width.
    def dropEvent(self, e):
        pos = e.position()
        widget = e.source()
        self.blayout.removeWidget(widget)

        for n in range(self.blayout.count()):
            # Get the widget at each index in turn.
            w = self.blayout.itemAt(n).widget()
            if pos.x() < w.x() + w.size().width() // 2:
                # We didn't drag past this widget.
                # insert to the left of it.
                break
        else:
            # We aren't on the left hand side of any widget,
            # so we're at the end. Increment 1 to insert after.
            n += 1
        self.blayout.insertWidget(n, widget)

        e.accept()
The complete working drag-drop code is shown below.
from PyQt6.QtCore import QMimeData, Qt
from PyQt6.QtGui import QDrag
from PyQt6.QtWidgets import QApplication, QHBoxLayout, QPushButton, QWidget


class DragButton(QPushButton):
    def mouseMoveEvent(self, e):
        if e.buttons() == Qt.MouseButton.LeftButton:
            drag = QDrag(self)
            mime = QMimeData()
            drag.setMimeData(mime)
            drag.exec(Qt.DropAction.MoveAction)


class Window(QWidget):
    def __init__(self):
        super().__init__()
        self.setAcceptDrops(True)

        self.blayout = QHBoxLayout()
        for l in ["A", "B", "C", "D"]:
            btn = DragButton(l)
            self.blayout.addWidget(btn)

        self.setLayout(self.blayout)

    def dragEnterEvent(self, e):
        e.accept()

    def dropEvent(self, e):
        pos = e.position()
        widget = e.source()
        self.blayout.removeWidget(widget)

        for n in range(self.blayout.count()):
            # Get the widget at each index in turn.
            w = self.blayout.itemAt(n).widget()
            if pos.x() < w.x() + w.size().width() // 2:
                # We didn't drag past this widget.
                # insert to the left of it.
                break
        else:
            # We aren't on the left hand side of any widget,
            # so we're at the end. Increment 1 to insert after.
            n += 1

        self.blayout.insertWidget(n, widget)

        e.accept()


app = QApplication([])
w = Window()
w.show()

app.exec()
We now have a working drag & drop implementation. Next we'll move onto improving the UX by showing the drag visually. First we'll add support for showing the button being dragged next to the mouse point as it is dragged. That way the user knows exactly what it is they are dragging.
Qt's QDrag handler natively provides a mechanism for showing dragged objects which we can use. We can update our DragButton class to pass a pixmap image to QDrag and this will be displayed under the mouse pointer as the drag occurs. To show the widget, we just need to get a QPixmap of the widget we're dragging.
from PyQt6.QtCore import QMimeData, Qt
from PyQt6.QtGui import QDrag, QPixmap
from PyQt6.QtWidgets import QApplication, QHBoxLayout, QPushButton, QWidget


class DragButton(QPushButton):
    def mouseMoveEvent(self, e):
        if e.buttons() == Qt.MouseButton.LeftButton:
            drag = QDrag(self)
            mime = QMimeData()
            drag.setMimeData(mime)

            pixmap = QPixmap(self.size())
            self.render(pixmap)
            drag.setPixmap(pixmap)

            drag.exec(Qt.DropAction.MoveAction)
To create the pixmap we create a QPixmap object passing in the size of the widget this event is fired on with self.size(). This creates an empty pixmap which we can then pass into self.render to render -- or draw -- the current widget onto it. That's it. Then we set the resulting pixmap on the drag object.
If you run the code with this modification you'll see something like the following --
Dragging of the widget showing the dragged widget.
We now have a working drag and drop behavior implemented on our window. We can take this a step further and implement a generic drag drop widget which allows us to sort arbitrary objects. In the code below we've created a new widget DragWidget which can be added to any window.
You can add items -- instances of DragItem -- which you want to be sorted, as well as setting data on them. When items are re-ordered the new order is emitted as a signal orderChanged.
from PyQt6.QtCore import QMimeData, Qt, pyqtSignal
from PyQt6.QtGui import QDrag, QPixmap
from PyQt6.QtWidgets import (
    QApplication,
    QHBoxLayout,
    QLabel,
    QMainWindow,
    QVBoxLayout,
    QWidget,
)


class DragItem(QLabel):
    def __init__(self, *args, **kwargs):
        super().__init__(*args, **kwargs)
        self.setContentsMargins(25, 5, 25, 5)
        self.setAlignment(Qt.AlignmentFlag.AlignCenter)
        self.setStyleSheet("border: 1px solid black;")
        # Store data separately from display label, but use label for default.
        self.data = self.text()

    def set_data(self, data):
        self.data = data

    def mouseMoveEvent(self, e):
        if e.buttons() == Qt.MouseButton.LeftButton:
            drag = QDrag(self)
            mime = QMimeData()
            drag.setMimeData(mime)

            pixmap = QPixmap(self.size())
            self.render(pixmap)
            drag.setPixmap(pixmap)

            drag.exec(Qt.DropAction.MoveAction)


class DragWidget(QWidget):
    """
    Generic list sorting handler.
    """

    orderChanged = pyqtSignal(list)

    def __init__(self, *args, orientation=Qt.Orientation.Vertical, **kwargs):
        super().__init__()
        self.setAcceptDrops(True)

        # Store the orientation for drag checks later.
        self.orientation = orientation

        if self.orientation == Qt.Orientation.Vertical:
            self.blayout = QVBoxLayout()
        else:
            self.blayout = QHBoxLayout()

        self.setLayout(self.blayout)

    def dragEnterEvent(self, e):
        e.accept()

    def dropEvent(self, e):
        pos = e.position()
        widget = e.source()
        self.blayout.removeWidget(widget)

        for n in range(self.blayout.count()):
            # Get the widget at each index in turn.
            w = self.blayout.itemAt(n).widget()
            if self.orientation == Qt.Orientation.Vertical:
                # Drag drop vertically.
                drop_here = pos.y() < w.y() + w.size().height() // 2
            else:
                # Drag drop horizontally.
                drop_here = pos.x() < w.x() + w.size().width() // 2

            if drop_here:
                break

        else:
            # We aren't on the left hand/upper side of any widget,
            # so we're at the end. Increment 1 to insert after.
            n += 1

        self.blayout.insertWidget(n, widget)
        self.orderChanged.emit(self.get_item_data())

        e.accept()

    def add_item(self, item):
        self.blayout.addWidget(item)

    def get_item_data(self):
        data = []
        for n in range(self.blayout.count()):
            # Get the widget at each index in turn.
            w = self.blayout.itemAt(n).widget()
            data.append(w.data)
        return data


class MainWindow(QMainWindow):
    def __init__(self):
        super().__init__()
        self.drag = DragWidget(orientation=Qt.Orientation.Vertical)
        for n, l in enumerate(["A", "B", "C", "D"]):
            item = DragItem(l)
            item.set_data(n)  # Store the data.
            self.drag.add_item(item)

        # Print out the changed order.
        self.drag.orderChanged.connect(print)

        container = QWidget()
        layout = QVBoxLayout()
        layout.addStretch(1)
        layout.addWidget(self.drag)
        layout.addStretch(1)
        container.setLayout(layout)

        self.setCentralWidget(container)


app = QApplication([])
w = MainWindow()
w.show()

app.exec()
Generic drag-drop sorting in horizontal orientation.
You'll notice that when creating the item, you can set the label by passing it in as a parameter (just like for a normal QLabel which we've subclassed from). But you can also set a data value, which is the internal value of this item -- this is what will be emitted when the order changes, or if you call get_item_data yourself. This separates the visual representation from what is actually being sorted, meaning you can use this to sort anything not just strings.
In the example above we're passing in the enumerated index as the data, so dragging will output (via the print connected to orderChanged) something like:
[1, 0, 2, 3]
[1, 2, 0, 3]
[1, 0, 2, 3]
[1, 2, 0, 3]
If you remove the item.set_data(n) you'll see the labels emitted on changes.
['B', 'A', 'C', 'D']
['B', 'C', 'A', 'D']
We've also implemented orientation onto the DragWidget using the Qt built in flags Qt.Orientation.Vertical or Qt.Orientation.Horizontal. This setting this allows you sort items either vertically or horizontally -- the calculations are handled for both directions.
Generic drag-drop sorting in vertical orientation.
If you experiment with the drag-drop tool above you'll notice that it doesn't feel completely intuitive. When dragging you don't know where an item will be inserted until you drop it. If it ends up in the wrong place, you'll then need to pick it up and re-drop it again, using guesswork to get it right.
With a bit of practice you can get the hang of it, but it would be nicer to make the behavior immediately obvious for users. Many drag-drop interfaces solve this problem by showing a preview of where the item will be dropped while dragging -- either by showing the item in the place where it will be dropped, or showing some kind of placeholder.
In this final section we'll implement this type of drag and drop preview indicator.
The first step is to define our target indicator. This is just another label, which in our example is empty, with custom styles applied to make it have a solid "shadow" like background. This makes it obviously different to the items in the list, so it stands out as something distinct.
from PyQt6.QtCore import QMimeData, Qt, pyqtSignal
from PyQt6.QtGui import QDrag, QPixmap
from PyQt6.QtWidgets import (
    QApplication,
    QHBoxLayout,
    QLabel,
    QMainWindow,
    QVBoxLayout,
    QWidget,
)


class DragTargetIndicator(QLabel):
    def __init__(self, parent=None):
        super().__init__(parent)
        self.setContentsMargins(25, 5, 25, 5)
        self.setStyleSheet(
            "QLabel { background-color: #ccc; border: 1px solid black; }"
        )
We've copied the contents margins from the items in the list. If you change your list items, remember to also update the indicator dimensions to match.
The drag item is unchanged, but we need to implement some additional behavior on our DragWidget to add the target, control showing and moving it.
First we'll add the drag target indicator to the layout on our DragWidget. This is hidden to begin with, but will be shown during the drag.
class DragWidget(QWidget):
    """
    Generic list sorting handler.
    """

    orderChanged = pyqtSignal(list)

    def __init__(self, *args, orientation=Qt.Orientation.Vertical, **kwargs):
        super().__init__()
        self.setAcceptDrops(True)

        # Store the orientation for drag checks later.
        self.orientation = orientation

        if self.orientation == Qt.Orientation.Vertical:
            self.blayout = QVBoxLayout()
        else:
            self.blayout = QHBoxLayout()

        # Add the drag target indicator. This is invisible by default,
        # we show it and move it around while the drag is active.
        self._drag_target_indicator = DragTargetIndicator()
        self.blayout.addWidget(self._drag_target_indicator)
        self._drag_target_indicator.hide()

        self.setLayout(self.blayout)
Next we modify the DragWidget.dragMoveEvent to show the drag target indicator. We show it by inserting it into the layout and then calling .show -- inserting a widget which is already in a layout will move it. We also hide the original item which is being dragged.
In the earlier examples we determined the position on drop by removing the widget being dragged, and then iterating over what is left. Because we now need to calculate the drop location before the drop, we take a different approach.
If we wanted to do it the same way, we'd need to remove the item on drag start, hold onto it and implement re-inserting at it's old position on drag fail. That's a lot of work.
Instead, the dragged item is left in place and hidden during move.
    def dragMoveEvent(self, e):
        # Find the correct location of the drop target, so we can move it there.
        index = self._find_drop_location(e)
        if index is not None:
            # Inserting moves the item if its alreaady in the layout.
            self.blayout.insertWidget(index, self._drag_target_indicator)
            # Hide the item being dragged.
            e.source().hide()
            # Show the target.
            self._drag_target_indicator.show()
        e.accept()
The method self._find_drop_location finds the index where the drag target will be shown (or the item dropped when the mouse released). We'll implement that next.
The calculation of the drop location follows the same pattern as before. We iterate over the items in the layout and calculate whether our mouse drop location is to the left of each widget. If it isn't to the left of any widget, we drop on the far right.
    def _find_drop_location(self, e):
        pos = e.position()
        spacing = self.blayout.spacing() / 2

        for n in range(self.blayout.count()):
            # Get the widget at each index in turn.
            w = self.blayout.itemAt(n).widget()

            if self.orientation == Qt.Orientation.Vertical:
                # Drag drop vertically.
                drop_here = (
                    pos.y() >= w.y() - spacing
                    and pos.y() <= w.y() + w.size().height() + spacing
                )
            else:
                # Drag drop horizontally.
                drop_here = (
                    pos.x() >= w.x() - spacing
                    and pos.x() <= w.x() + w.size().width() + spacing
                )

            if drop_here:
                # Drop over this target.
                break

        return n
The drop location n is returned for use in the dragMoveEvent to place the drop target indicator.
Next wee need to update the get_item_data handler to ignore the drop target indicator. To do this we check w against self._drag_target_indicator and skip if it is the same. With this change the method will work as expected.
    def get_item_data(self):
        data = []
        for n in range(self.blayout.count()):
            # Get the widget at each index in turn.
            w = self.blayout.itemAt(n).widget()
            if w != self._drag_target_indicator:
                # The target indicator has no data.
                data.append(w.data)
        return data
If you run the code a this point the drag behavior will work as expected. But if you drag the widget outside of the window and drop you'll notice a problem: the target indicator will stay in place, but dropping the item won't drop the item in that position (the drop will be cancelled).
To fix that we need to implement a dragLeaveEvent which hides the indicator.
    def dragLeaveEvent(self, e):
        self._drag_target_indicator.hide()
        e.accept()
With those changes, the drag-drop behavior should be working as intended. The complete code is shown below.
from PyQt6.QtCore import QMimeData, Qt, pyqtSignal
from PyQt6.QtGui import QDrag, QPixmap
from PyQt6.QtWidgets import (
    QApplication,
    QHBoxLayout,
    QLabel,
    QMainWindow,
    QVBoxLayout,
    QWidget,
)


class DragTargetIndicator(QLabel):
    def __init__(self, parent=None):
        super().__init__(parent)
        self.setContentsMargins(25, 5, 25, 5)
        self.setStyleSheet(
            "QLabel { background-color: #ccc; border: 1px solid black; }"
        )


class DragItem(QLabel):
    def __init__(self, *args, **kwargs):
        super().__init__(*args, **kwargs)
        self.setContentsMargins(25, 5, 25, 5)
        self.setAlignment(Qt.AlignmentFlag.AlignCenter)
        self.setStyleSheet("border: 1px solid black;")
        # Store data separately from display label, but use label for default.
        self.data = self.text()

    def set_data(self, data):
        self.data = data

    def mouseMoveEvent(self, e):
        if e.buttons() == Qt.MouseButton.LeftButton:
            drag = QDrag(self)
            mime = QMimeData()
            drag.setMimeData(mime)

            pixmap = QPixmap(self.size())
            self.render(pixmap)
            drag.setPixmap(pixmap)

            drag.exec(Qt.DropAction.MoveAction)
            self.show() # Show this widget again, if it's dropped outside.


class DragWidget(QWidget):
    """
    Generic list sorting handler.
    """

    orderChanged = pyqtSignal(list)

    def __init__(self, *args, orientation=Qt.Orientation.Vertical, **kwargs):
        super().__init__()
        self.setAcceptDrops(True)

        # Store the orientation for drag checks later.
        self.orientation = orientation

        if self.orientation == Qt.Orientation.Vertical:
            self.blayout = QVBoxLayout()
        else:
            self.blayout = QHBoxLayout()

        # Add the drag target indicator. This is invisible by default,
        # we show it and move it around while the drag is active.
        self._drag_target_indicator = DragTargetIndicator()
        self.blayout.addWidget(self._drag_target_indicator)
        self._drag_target_indicator.hide()

        self.setLayout(self.blayout)

    def dragEnterEvent(self, e):
        e.accept()

    def dragLeaveEvent(self, e):
        self._drag_target_indicator.hide()
        e.accept()

    def dragMoveEvent(self, e):
        # Find the correct location of the drop target, so we can move it there.
        index = self._find_drop_location(e)
        if index is not None:
            # Inserting moves the item if its alreaady in the layout.
            self.blayout.insertWidget(index, self._drag_target_indicator)
            # Hide the item being dragged.
            e.source().hide()
            # Show the target.
            self._drag_target_indicator.show()
        e.accept()

    def dropEvent(self, e):
        widget = e.source()
        # Use drop target location for destination, then remove it.
        self._drag_target_indicator.hide()
        index = self.blayout.indexOf(self._drag_target_indicator)
        if index is not None:
            self.blayout.insertWidget(index, widget)
            self.orderChanged.emit(self.get_item_data())
            widget.show()
            self.blayout.activate()
        e.accept()

    def _find_drop_location(self, e):
        pos = e.position()
        spacing = self.blayout.spacing() / 2

        for n in range(self.blayout.count()):
            # Get the widget at each index in turn.
            w = self.blayout.itemAt(n).widget()

            if self.orientation == Qt.Orientation.Vertical:
                # Drag drop vertically.
                drop_here = (
                    pos.y() >= w.y() - spacing
                    and pos.y() <= w.y() + w.size().height() + spacing
                )
            else:
                # Drag drop horizontally.
                drop_here = (
                    pos.x() >= w.x() - spacing
                    and pos.x() <= w.x() + w.size().width() + spacing
                )

            if drop_here:
                # Drop over this target.
                break

        return n

    def add_item(self, item):
        self.blayout.addWidget(item)

    def get_item_data(self):
        data = []
        for n in range(self.blayout.count()):
            # Get the widget at each index in turn.
            w = self.blayout.itemAt(n).widget()
            if w != self._drag_target_indicator:
                # The target indicator has no data.
                data.append(w.data)
        return data


class MainWindow(QMainWindow):
    def __init__(self):
        super().__init__()
        self.drag = DragWidget(orientation=Qt.Orientation.Vertical)
        for n, l in enumerate(["A", "B", "C", "D"]):
            item = DragItem(l)
            item.set_data(n)  # Store the data.
            self.drag.add_item(item)

        # Print out the changed order.
        self.drag.orderChanged.connect(print)

        container = QWidget()
        layout = QVBoxLayout()
        layout.addStretch(1)
        layout.addWidget(self.drag)
        layout.addStretch(1)
        container.setLayout(layout)

        self.setCentralWidget(container)


app = QApplication([])
w = MainWindow()
w.show()

app.exec()
If you run this example on macOS you may notice that the widget drag preview (the QPixmap created on DragItem) is a bit blurry. On high-resolution screens you need to set the device pixel ratio and scale up the pixmap when you create it. Below is a modified DragItem class which does this.
Update DragItem to support high resolution screens.
class DragItem(QLabel):
    def __init__(self, *args, **kwargs):
        super().__init__(*args, **kwargs)
        self.setContentsMargins(25, 5, 25, 5)
        self.setAlignment(Qt.AlignmentFlag.AlignCenter)
        self.setStyleSheet("border: 1px solid black;")
        # Store data separately from display label, but use label for default.
        self.data = self.text()

    def set_data(self, data):
        self.data = data

    def mouseMoveEvent(self, e):
        if e.buttons() == Qt.MouseButton.LeftButton:
            drag = QDrag(self)
            mime = QMimeData()
            drag.setMimeData(mime)

            # Render at x2 pixel ratio to avoid blur on Retina screens.
            pixmap = QPixmap(self.size().width() * 2, self.size().height() * 2)
            pixmap.setDevicePixelRatio(2)
            self.render(pixmap)
            drag.setPixmap(pixmap)

            drag.exec(Qt.DropAction.MoveAction)
            self.show() # Show this widget again, if it's dropped outside.
That's it! We've created a generic drag-drop handled which can be added to any projects where you need to be able to reposition items within a list. You should feel free to experiment with the styling of the drag items and targets as this won't affect the behavior.
The QLineEdit class is a versatile tool for single-line text input. The widget facilitates text manipulation by supporting insertion, deletion, selection, and cut-copy-paste operations natively. You can use line edits when you need to accept text input from your users in a PyQt/PySide application.
The widget is highly customizable. You can set it up to include placeholder text, input masks, input validators, and more. It also supports many keyboard shortcuts out of the box and is able to process custom ones. This feature opens an opportunity to enhance user input speed and efficiency.
In this article, you will learn the basics of using QLineEdit by going through its most commonly used features and capabilities.
QLineEditA line edit allows the user to enter and edit a single line of plain text with a useful collection of editing functionalities, such as insertion, deletion, selection, cut-copy-paste, and drag-and-drop operations.
If you've used PyQt or PySide to create GUI applications in Python, then it'd be likely that you already know about the QLineEdit class. This class allows you to create line edits in your graphical interfaces (GUI) quickly.
The QLineEidt class provides two different constructors that you can use to create line edits according to your needs:
| Constructor | Description |
|---|---|
QLineEdit(parent: QWidget = None) |
Constructs a line edit with a parent widget but without text |
QLineEdit(text: str, parent: QWidget = None) |
Constructs a line edit with default text and a parent widget |
The parent widget would be the window or dialog where you need to place the line edit. The text can be a default text that will appear in the line edit when you run the application.
To illustrate how to use the above constructors, we can code a demo example:
from PyQt6.QtWidgets import QApplication, QLineEdit, QVBoxLayout, QWidget

class Window(QWidget):
    def __init__(self, parent=None):
        super().__init__(parent)
        self.setWindowTitle("QLineEdit Constructors")
        self.resize(300, 100)
        # Line edit with a parent widget
        top_line_edit = QLineEdit(parent=self)
        # Line edit with a parent widget and a default text
        bottom_line_edit = QLineEdit(
            "Hello! This is a line edit.", parent=self
        )

        layout = QVBoxLayout()
        layout.addWidget(top_line_edit)
        layout.addWidget(bottom_line_edit)
        self.setLayout(layout)

app = QApplication([])
window = Window()
window.show()
app.exec()
In this example, we first do the required imports and then define the Window class inheriting from QWidget. Inside Window, we create two QLineEdit widgets.
To create the first line edit, we use the first constructor of QLineEdit, passing only a parent widget. For the second line editor, we use the second constructor, which requires the parent widget and a default text. Note that the text is a regular Python string.
Save the code to a file called constructors.py file and run it from your command line. You'll get a window that looks something like this:
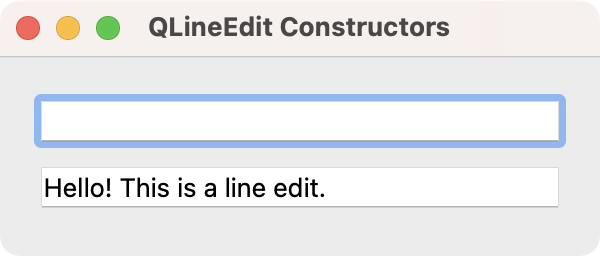 Standard window showing our two line edits.
The first line edit has no text. In most cases, this is how you would create your line edits because they're designed for accepting input. If you'd like to just display some text, then you can use a QLabel widget instead. The second line edit displays the text that you passed to the constructor.
Both line edits are ready for accepting input text. Note that you can use all the following keyboard shortcuts to optimize your text input process:
| Keys | Action |
|---|---|
| Left Arrow | Moves the cursor one character to the left |
| Shift+Left Arrow | Moves and selects text one character to the left |
| Right Arrow | Moves the cursor one character to the right |
| Shift+Right Arrow | Moves and selects text one character to the right |
| Home | Moves the cursor to the beginning of the line |
| End | Moves the cursor to the end of the line |
| Backspace | Deletes the character to the left of the cursor |
| Ctrl+Backspace | Deletes the word to the left of the cursor |
| Delete | Deletes the character to the right of the cursor |
| Ctrl+Delete | Deletes the word to the right of the cursor |
| Ctrl+A | Select all |
| Ctrl+C | Copies the selected text to the clipboard |
| Ctrl+Insert | Copies the selected text to the clipboard |
| Ctrl+K | Deletes to the end of the line |
| Ctrl+V | Pastes the clipboard text into the line edit |
| Shift+Insert | Pastes the clipboard text into the line edit |
| Ctrl+X | Deletes the selected text and copies it to the clipboard |
| Shift+Delete | Deletes the selected text and copies it to the clipboard |
| Ctrl+Z | Undoes the last operation |
| Ctrl+Y | Redoes the last undone operation |
That's a lot of shortcuts! This table is just a sample of all the features that the QLineEdit class provides out of the box.
In addition to these keyboard shortcuts, the QLineEdit class provides a context menu that you can trigger by clicking on a line edit using the right button of your mouse:
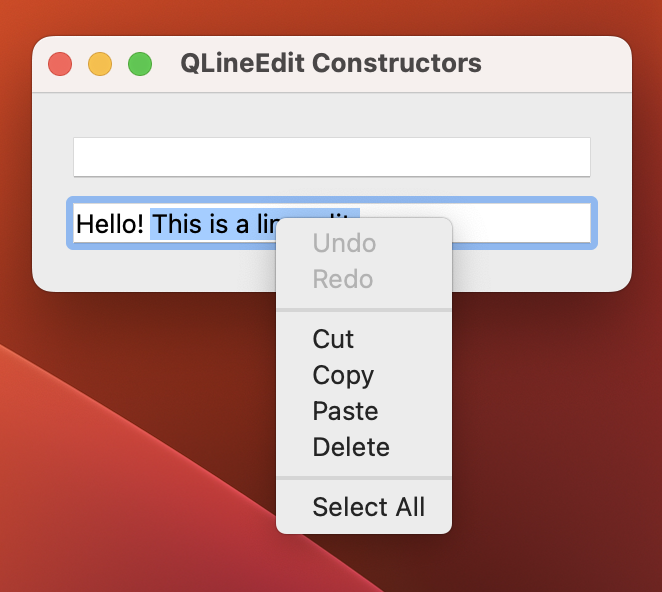 QLineEdit with a context menu visible.
The built-in context menu provides basic edition options, such as cut, copy, paste, and delete. It also has options for undoing and redoing edits, and for selecting all the content of a given line edit.
Sometimes, we need to make a line edit non-editable. By default, all line edits are editable because their main use case is to provide text input for the user. However, in some situations, a non-editable line edit can be useful.
For example, say that you're creating a GUI application that generates some recovery keys for the users. The user must be able to copy the key to a safe place so that they can use it to recover access if they forget their password. In this situation, creating a non-editable line edit can provide a suitable solution.
To make a line edit read-only, we can use the readOnly property and its setter method setReadOnly() as in the following example:
import secrets

from PyQt6.QtWidgets import (
    QApplication,
    QLabel,
    QLineEdit,
    QVBoxLayout,
    QWidget,
)

class Window(QWidget):
    def __init__(self, parent=None):
        super().__init__(parent)
        self.setWindowTitle("Non-editable QLineEdit")
        self.resize(300, 100)
        non_editable_line_edit = QLineEdit(parent=self)
        non_editable_line_edit.setReadOnly(True)
        non_editable_line_edit.setText(secrets.token_hex(16))

        layout = QVBoxLayout()
        layout.addWidget(QLabel(parent=self, text="Your secret key:"))
        layout.addWidget(non_editable_line_edit)
        self.setLayout(layout)

app = QApplication([])
window = Window()
window.show()
app.exec()
In this example, we create a non-editable line edit by using the setReadOnly() method. When we set the readOnly property to True, our line edit won't accept editions. It'll only allow us to select and copy its content.
Go ahead and run the application from your command line to explore how this line edit works. You'll get a window like the following:
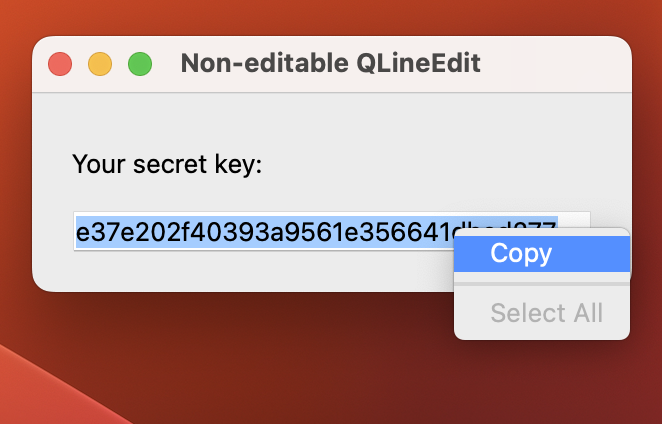 A read-only line edit with editing disabled.
If you play a bit with this line edit, you'll soon discover that you can't change its text. You'll also note that the options in the context menu are now limited to Copy and Select All.
Another cool feature of the QLineEdit class is that it allows you to create text input for passwords. This can be pretty convenient for those applications that manage several users, and each user needs to have access credentials.
You can create line edits for passwords by using the echoMode() method. This method takes one of the following constants as an argument:
| Constant | Value | Description |
|---|---|---|
QLineEdit.EchoMode.Normal |
0 |
Display characters as you enter them. |
QLineEdit.EchoMode.NoEcho |
1 |
Display no characters when you enter them. |
QLineEdit.EchoMode.Password |
2 |
Display platform-dependent password mask characters instead of the characters you enter. |
QLineEdit.EchoMode.PasswordEchoOnEdit |
3 |
Display characters as you enter them while editing. Display characters as the Password mode does when reading. |
The Normal mode is the default. The NoEcho mode may be appropriate for critical passwords where even the length of the password should be kept secret. The Password mode is appropriate for most password use cases, however PasswordEchoOnEdit can be used instead if you need to give users some confirmation of what they are typing.
Here's a sample app that shows a user and password form:
from PyQt6.QtWidgets import (
    QApplication,
    QFormLayout,
    QLineEdit,
    QWidget,
)

class Window(QWidget):
    def __init__(self, parent=None):
        super().__init__(parent)
        self.setWindowTitle("Password QLineEdit")
        self.resize(300, 100)
        username_line_edit = QLineEdit(parent=self)
        password_line_edit = QLineEdit(parent=self)
        password_line_edit.setEchoMode(QLineEdit.EchoMode.Password)

        layout = QFormLayout()
        layout.addRow("Username:", username_line_edit)
        layout.addRow("Password:", password_line_edit)
        self.setLayout(layout)

app = QApplication([])
window = Window()
window.show()
app.exec()
In this example, you call setEchoMode() on the password_line_edit widget using the Password mode as an argument. When you run this code from your command line, you get the following window on your screen:
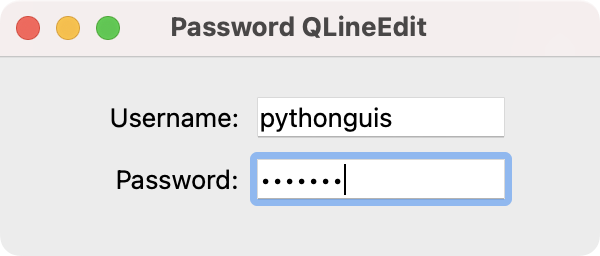 Window with a username and password line edit.
The username_line_edit line edit is in Normal mode, so we can see the characters as we type them in. In contrast, the Password line edit is in Password mode. In this case, when we enter a character, the line edit shows the platform's character for passwords.
You can change the text of a line edit using the setText() or insert() methods. You can retrieve the text with the text() method. However, these are not the only operations that you can perform with the text of a line edit.
The following table shows a summary of some of the most commonly used methods for text manipulation in line edits:
| Method | Description |
|---|---|
setText(text) |
Sets the text of a line edit to text, clears the selection, clears the undo/redo history, moves the cursor to the end of the line, and resets the modified property to false. |
insert(text) |
Deletes any selected text, inserts text, and validates the result. If it is valid, it sets it as the new contents of the line edit. |
clear() |
Clears the contents of the line edit. |
copy() |
Copies the selected text to the clipboard. |
cut() |
Copies the selected text to the clipboard and deletes it from the line edit. |
paste() |
Inserts the clipboard's text at the cursor position, deleting any selected text. |
redo() |
Redoes the last operation if redo is available. Redo becomes available once the user has performed one or more undo operations on text in the line edit. |
undo() |
Undoes the last operation if undo is available. Undo becomes available once the user has modified the text in the line edit. |
selectAll() |
Selects all the text and moves the cursor to the end. |
You can use any of these methods to manipulate the text of a line edit from your code. Consider the following example where you have two line edits and two buttons that take advantage of some of the above methods to copy some text from one line edit to the other:
from PyQt6.QtWidgets import (
    QApplication,
    QGridLayout,
    QLabel,
    QLineEdit,
    QPushButton,
    QWidget,
)

class Window(QWidget):
    def __init__(self, parent=None):
        super().__init__(parent)
        self.setWindowTitle("Copy and Paste")
        self.resize(300, 100)

        self.source_line_edit = QLineEdit(parent=self)
        self.source_line_edit.setText("Hello, World!")
        self.dest_line_edit = QLineEdit(parent=self)

        copy_button = QPushButton(parent=self, text="Copy")
        paste_button = QPushButton(parent=self, text="Paste")

        copy_button.clicked.connect(self.copy)
        paste_button.clicked.connect(self.paste)

        layout = QGridLayout()
        layout.addWidget(self.source_line_edit, 0, 0)
        layout.addWidget(copy_button, 0, 1)
        layout.addWidget(self.dest_line_edit, 1, 0)
        layout.addWidget(paste_button, 1, 1)
        self.setLayout(layout)

    def copy(self):
        self.source_line_edit.selectAll()
        self.source_line_edit.copy()

    def paste(self):
        self.dest_line_edit.clear()
        self.dest_line_edit.paste()

app = QApplication([])
window = Window()
window.show()
app.exec()
In this example, we create two line edits. The first one will hold some sample text. The second line edit will receive the text. Then, we create two buttons and connect their clicked signals to the copy() and paste() slots.
Inside the copy() method we first select all the text from the source line edit. Then we use the copy() method to copy the selected text to the clipboard. In paste(), we call clear() on the destination line edit to remove any previous text. Then, we use the paste() method to copy the clipboard's content.
Go ahead and run the application. You'll get the following window on your screen:
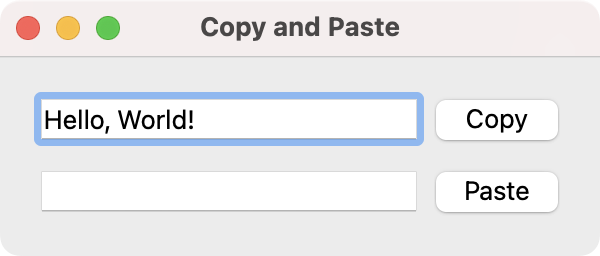 QLineEdit with Copy & Paste buttons attached to handlers.
Once you've run the app, then you can click the Copy button to copy the text in the first line edit. Next, you can click the Paste button to paste the copied text to the second line edit. Go ahead and give it a try!
You can also align and format the text in a line edit. For example, for text alignment, you can use the setAlignment() method with one or more alignment flags. Some of the most useful flags that you can find in the Qt.AlignmentFlag namespace includes the following:
| Flag | Description |
|---|---|
AlignLeft |
Aligns with the left edge. |
AlignRight |
Aligns with the right edge. |
AlignHCenter |
Centers horizontally in the available space. |
AlignJustify |
Justifies the text in the available space. |
AlignTop |
Aligns with the top. |
AlignBottom |
Aligns with the bottom. |
AlignVCenter |
Centers vertically in the available space. |
AlignCenter |
Centers in both dimensions. |
If you want to apply multiple alignment flags to a given line edit, you don't have to call setAlignment() multiple times. You can just use the bitwise OR operator (|) to combine them. Consider the following example:
from PyQt6.QtCore import Qt
from PyQt6.QtWidgets import QApplication, QLineEdit

class Window(QLineEdit):
    def __init__(self, parent=None):
        super().__init__(parent)
        self.setWindowTitle("Aligning Text")
        self.resize(300, 100)
        self.setText("Hello, World!")
        self.setAlignment(Qt.AlignmentFlag.AlignCenter)

app = QApplication([])
window = Window()
window.show()
app.exec()
In this example, we use a QLineEdit as the only component of our app's GUI. Using the setAlignment() method, we center the "Hello, World!" message in both directions, horizontally and vertically. To do this, we use the AlignCenter flag. Here's what the app looks like:
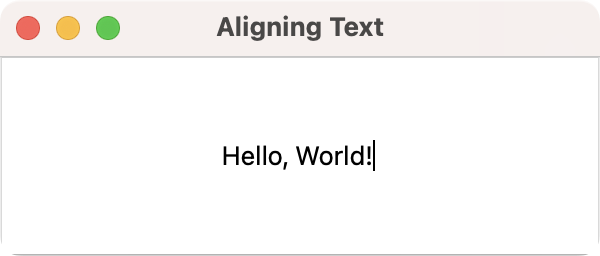 QLineEdit with text alignment set.
Go ahead and play with other flags to see their effect on the text alignment. Use the | bitwise operator to combine several alignment flags.
Line edits also have a textMargins property that you can tweak to customize the text alignment using specific values. To set margin values for your text, you can use the setTextMargins() method, which has the following signatures:
| Method | Description |
|---|---|
setTextMargins(left, top, right, bottom) |
Sets the margins around the text to have the sizes left, top, right, and bottom. |
setTextMargins(margins) |
Sets the margins around the text using a QMargins object. |
The first signature allows you to provide four integer values as the left, top, right, and bottom margins for the text. The second signature accepts a QMargins object as an argument. To build this object, you can use four integer values with the same meaning as the left, top, right, and bottom arguments in the first signature.
Here's an example of how to set custom margins for the text in a line edit:
from PyQt6.QtWidgets import QApplication, QLineEdit

class Window(QLineEdit):
    def __init__(self, parent=None):
        super().__init__(parent)
        self.setWindowTitle("Aligning Text")
        self.resize(300, 100)
        self.setText("Hello, World!")
        self.setTextMargins(30, 30, 0, 0)

app = QApplication([])
window = Window()
window.show()
app.exec()
In this example, you set the left and top margins to custom values. Here's how this app looks when you run it:
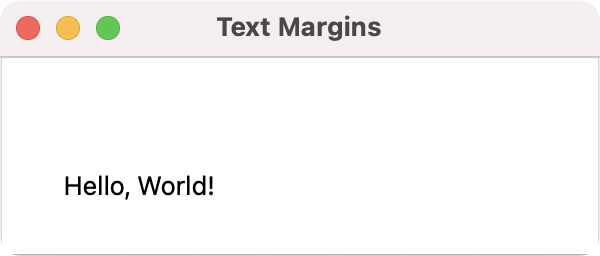 QLineEdit with text margins added.
Using the setTextMargins() method, we can place the text in the desired place in a line edit, which may be a requirement in some situations.
When you're creating a GUI application and you need to use line edits, you may need to perform actions when the user enters or modifies the content of the line edit. To do this, you need to connect some of the signals of the line edit to specific slots or functions.
Depending on specific user events, the QLineEdit class can emit several different signals. Here's is a summary of these signals and their corresponding meaning:
| Signal | Emitted |
|---|---|
textChanged(text) |
Whenever the user changes the text either manually or programmatically. The text argument is the new text. |
textEdited(text) |
Whenever the user edits the text manually. The text argument is the new text. |
editingFinished |
When the user presses the Return or Enter key, or when the line edit loses focus, and its contents have changed since the last time this signal was emitted. |
inputRejected |
When the user presses a key that is an unacceptable input. |
returnPressed |
When the user presses the Return or Enter key. |
selectionChanged |
When the selection changes. |
We can connect either of these signals with any slot. A slot is a method or function that performs a concrete action in your application. We can connect a signal and a slot so that the slot gets called when the signal gets emitted. Here's the required syntax to do this:
line_edit.<signal>.connect(<method>)
In this construct, line_edit is the QLineEdit object that we need to connect with a given slot. The <signal> placeholder can be any of the abovementioned signals. Finally, <method> represents the target slot or method.
Let's write an example that puts this syntax into action. For this example, we'll connect the textEdited signal with a method that updates the text of a QLabel to match the text of our line edit:
from PyQt6.QtWidgets import (
    QApplication,
    QLabel,
    QLineEdit,
    QVBoxLayout,
    QWidget,
)

class Window(QWidget):
    def __init__(self, parent=None):
        super().__init__(parent)
        self.setWindowTitle("Signal and Slot")
        self.resize(300, 100)

        self.line_edit = QLineEdit(parent=self)
        self.label = QLabel(parent=self)
        self.line_edit.textEdited.connect(self.update_label)

        layout = QVBoxLayout()
        layout.addWidget(self.line_edit)
        layout.addWidget(self.label)
        self.setLayout(layout)

    def update_label(self):
        self.label.setText(self.line_edit.text())

app = QApplication([])
window = Window()
window.show()
app.exec()
In this example, we connect the line edit's textEdited signal with the update_label() method, which sets the label's text to match the text we enter in our line edit. Go ahead and run the app. Then, enter some text in the line edit and see what happens with the label at the bottom of the app's window.
We can provide input validators to our line edits using the setValidator() method. This method takes a QValidator object as an argument. PyQt has a few built-in validators that you can use directly on a line edit:
Validator objects process the input to check whether it's valid. In general, validator object has three possible states:
| Constant | Value | Description |
|---|---|---|
QValidator.State.Invalid |
0 |
The input is invalid. |
QValidator.State.Intermediate |
1 |
The input is a valid intermediate value. |
QValidator.State.Acceptable |
2 |
The input is acceptable as a final result. |
When you set a validator to a given line edit, the user may change the content to any Intermediate value during editing. However, they can't edit the text to a value that is Invalid. The line edit will emit the returnPressed and editingFinished signals only when the validator validates input as Acceptable.
Here's an example where we use a QIntValidator and a QRegularExpressionValidator
from PyQt6.QtCore import QRegularExpression
from PyQt6.QtGui import QIntValidator, QRegularExpressionValidator
from PyQt6.QtWidgets import (
    QApplication,
    QFormLayout,
    QLabel,
    QLineEdit,
    QWidget,
)

class Window(QWidget):
    def __init__(self, parent=None):
        super().__init__(parent)
        self.setWindowTitle("Input Validators")
        self.resize(300, 100)

        self.int_line_edit = QLineEdit(parent=self)
        self.int_line_edit.setValidator(QIntValidator())

        self.uppercase_line_edit = QLineEdit(parent=self)
        input_validator = QRegularExpressionValidator(
            QRegularExpression("[A-Z]+"), self.uppercase_line_edit
        )
        self.uppercase_line_edit.setValidator(input_validator)
        self.uppercase_line_edit.returnPressed.connect(self.update_label)

        self.signal_label = QLabel(parent=self)

        layout = QFormLayout()
        layout.addRow("Integers:", self.int_line_edit)
        layout.addRow("Uppercase letters:", self.uppercase_line_edit)
        layout.addRow("Signal:", self.signal_label)
        self.setLayout(layout)

    def update_label(self):
        self.signal_label.setText("Return pressed!")

if __name__ == "__main__":
    app = QApplication([])
    window = Window()
    window.show()
    app.exec()
In this example, we have two line edits. In the first line edit, we've used a QIntValidator object. This way, the line edit will only accept valid integer numbers. If you try to type in something different, then the line edit won't accept your input.
In the second line edit, we've used a QRegularExpressionValidator. In this specific case, the regular expression accepts one or more uppercase letters. Again if you try to enter something else, then the line edit won't accept the input.
The QLabel will show the text Return pressed! if the input in the second line edit is valid and you press the Enter key. Here's what the app looks like:
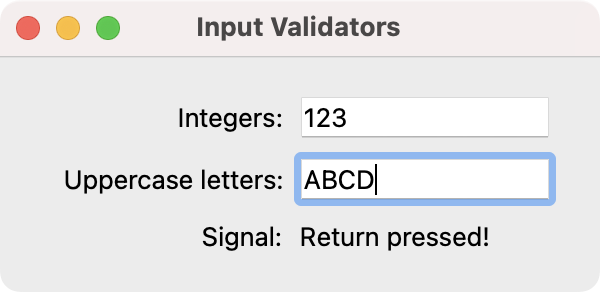 QLineEdit with input validator.
Validators provide a quick way to restrict the user input and set our own validation rules. This way, we can ensure valid user input in our applications.
Line edits are pretty useful widgets in any GUI application. They allow text input through a single-line editor that has many cool features.
In this tutorial, you've learned how to create, use, and customize your line edits while building a GUI application with PyQt/PySide.
Felgo specializes in unique Qt products and tools to develop fast and efficiently. QML Hot Reload is one of them, and it transforms the way you develop Qt Quick applications.
The Felgo Hot Reload release now makes the tool available as a standalone product - independent from the Felgo SDK. This means that you can integrate code reloading to any Qt/QML project to enhance your development workflow. To do so, simply add the Felgo QML Hot Reload library to your project. No change to your production code is required.

Read this post to learn why you should not miss QML Hot Reload in your development setup, and what benefits it brings to your project:

Visual Studio Code ranks #1 among the most popular development tools in the annual developers survey of Stack Overflow. More than 70% of all participants use this code editor for development. And there’s a reason why: It is fast, reliable, supports a wide range of languages and runs on Windows, macOS and Linux.
With the right extensions and tools, you can set up and use Visual Studio Code to develop your Qt and QML projects. Watch the tutorial or read this guide to learn how:
Cutelyst the Qt web framework is now at v4.0.0 just a bit later for it's 10th anniversary.
With 2.5k commits it has been steadly improving, and in production for many high traffic applications. With this release we say good bye to our old Qt5 friend, also dropped uWSGI support, clearsilver and Grantlee were also removed, many methods now take a QStringView and Cutelyst::Header class was heavly refactored to allow usage of QByteArrayView, and stopped storing QStrings internally in a QHash, they are QByteArray inside a vector.
Before, all headers were uppercased and dashes replaced with underscores, this was quite some work, so that when searching the string had to be converted to this format to be searcheable, this had the advantage of allowing the use of QHash and in templates you could c.request.header.CONTENT_TYPE. Turns out both cases aren't so important, speed is more important for the wider use cases.
With these changes Cutelyst managed to get 10 - 15% faster on TechEmpower benchmarks, which is great as we are still well positioned as a full stack framework there.
https://github.com/cutelyst/cutelyst/releases/tag/v4.0.0
Have fun, Merry Christmas and Happy New Year!